> ## Documentation Index
> Fetch the complete documentation index at: https://qovery-docs-rde-install-script.mintlify.site/llms.txt
> Use this file to discover all available pages before exploring further.
# Setting Up Cloudflare and Custom Domain on Qovery
> Configure Cloudflare as a domain provider for your Qovery applications
This tutorial guides you through configuring Cloudflare as a domain provider for applications deployed on Qovery. The process involves adding a custom domain and establishing proper DNS and SSL/TLS settings.
## Prerequisites
* Active Qovery application
* Domain ownership on Cloudflare or registrar
* Access to Cloudflare DNS settings
## Step 1: Add a Custom Domain
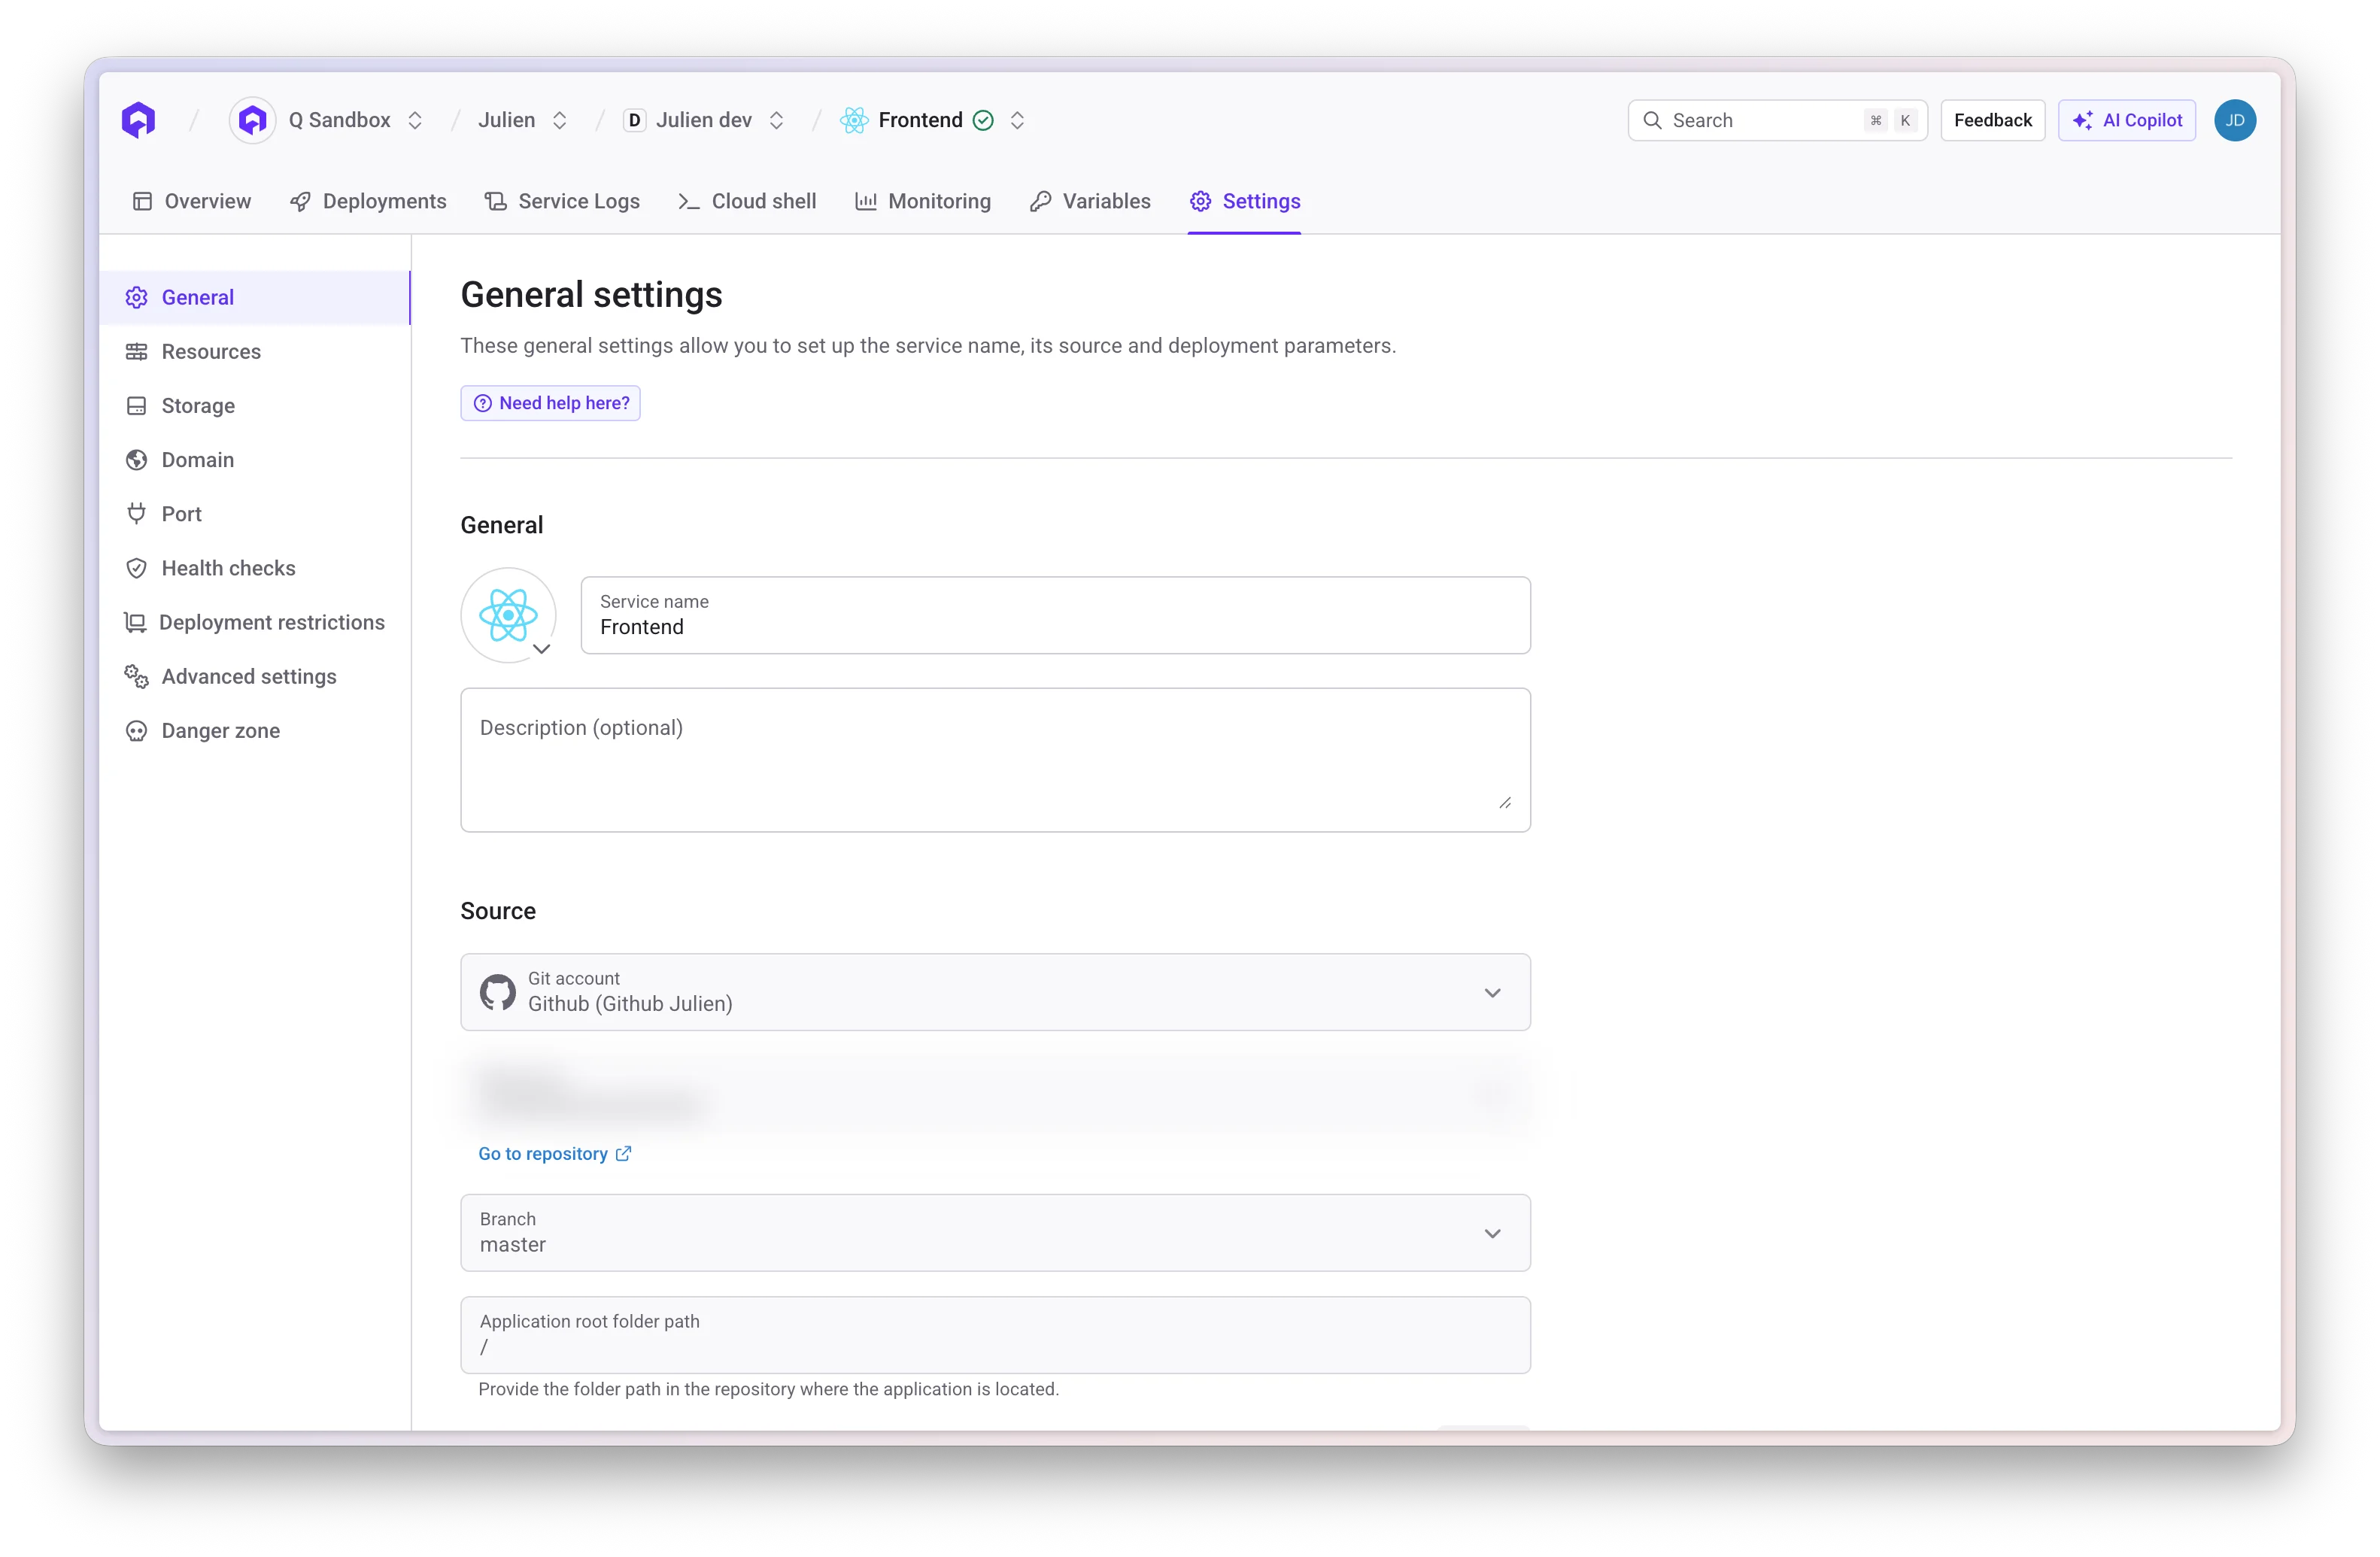
1. Access your application settings in Qovery Console
2. Navigate to the **Domains** section
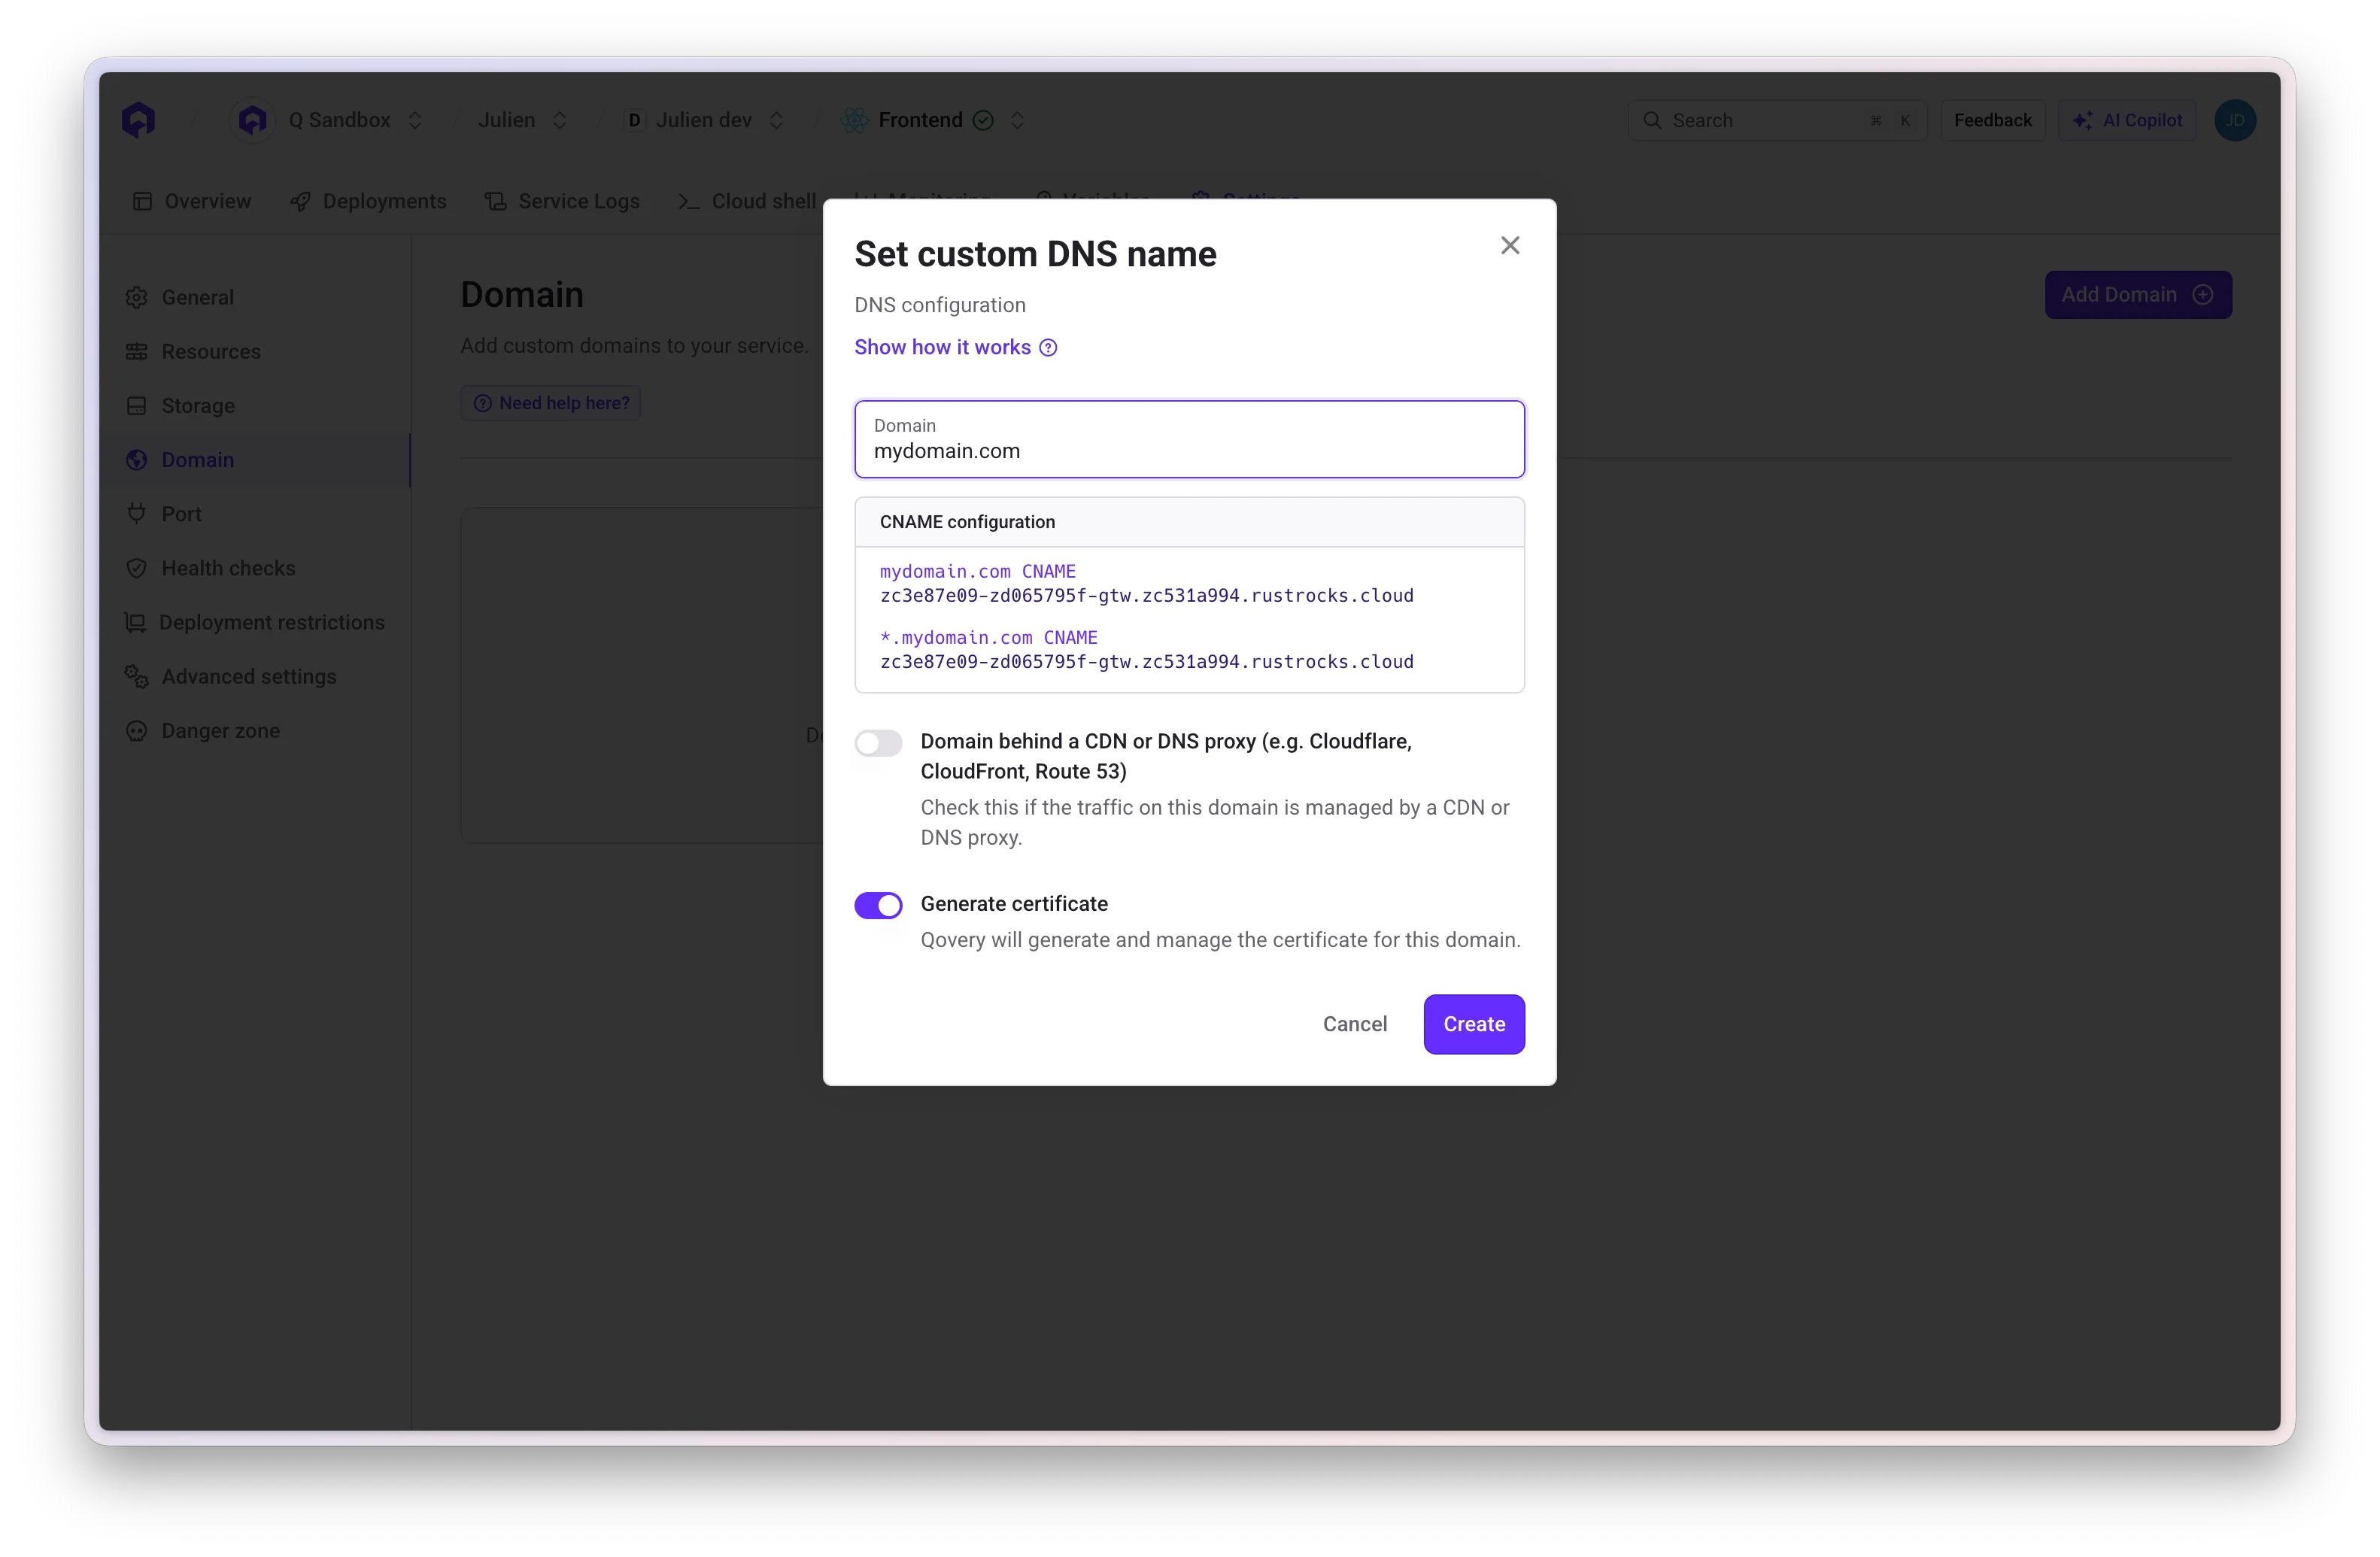
3. Enter your Cloudflare-managed domain
4. **Critical**: Enable the **"Domain behind a CDN"** toggle
Enabling "Domain behind a CDN" automatically disables certificate generation since Cloudflare handles SSL/TLS management.
 ## Step 2: Configure Cloudflare DNS
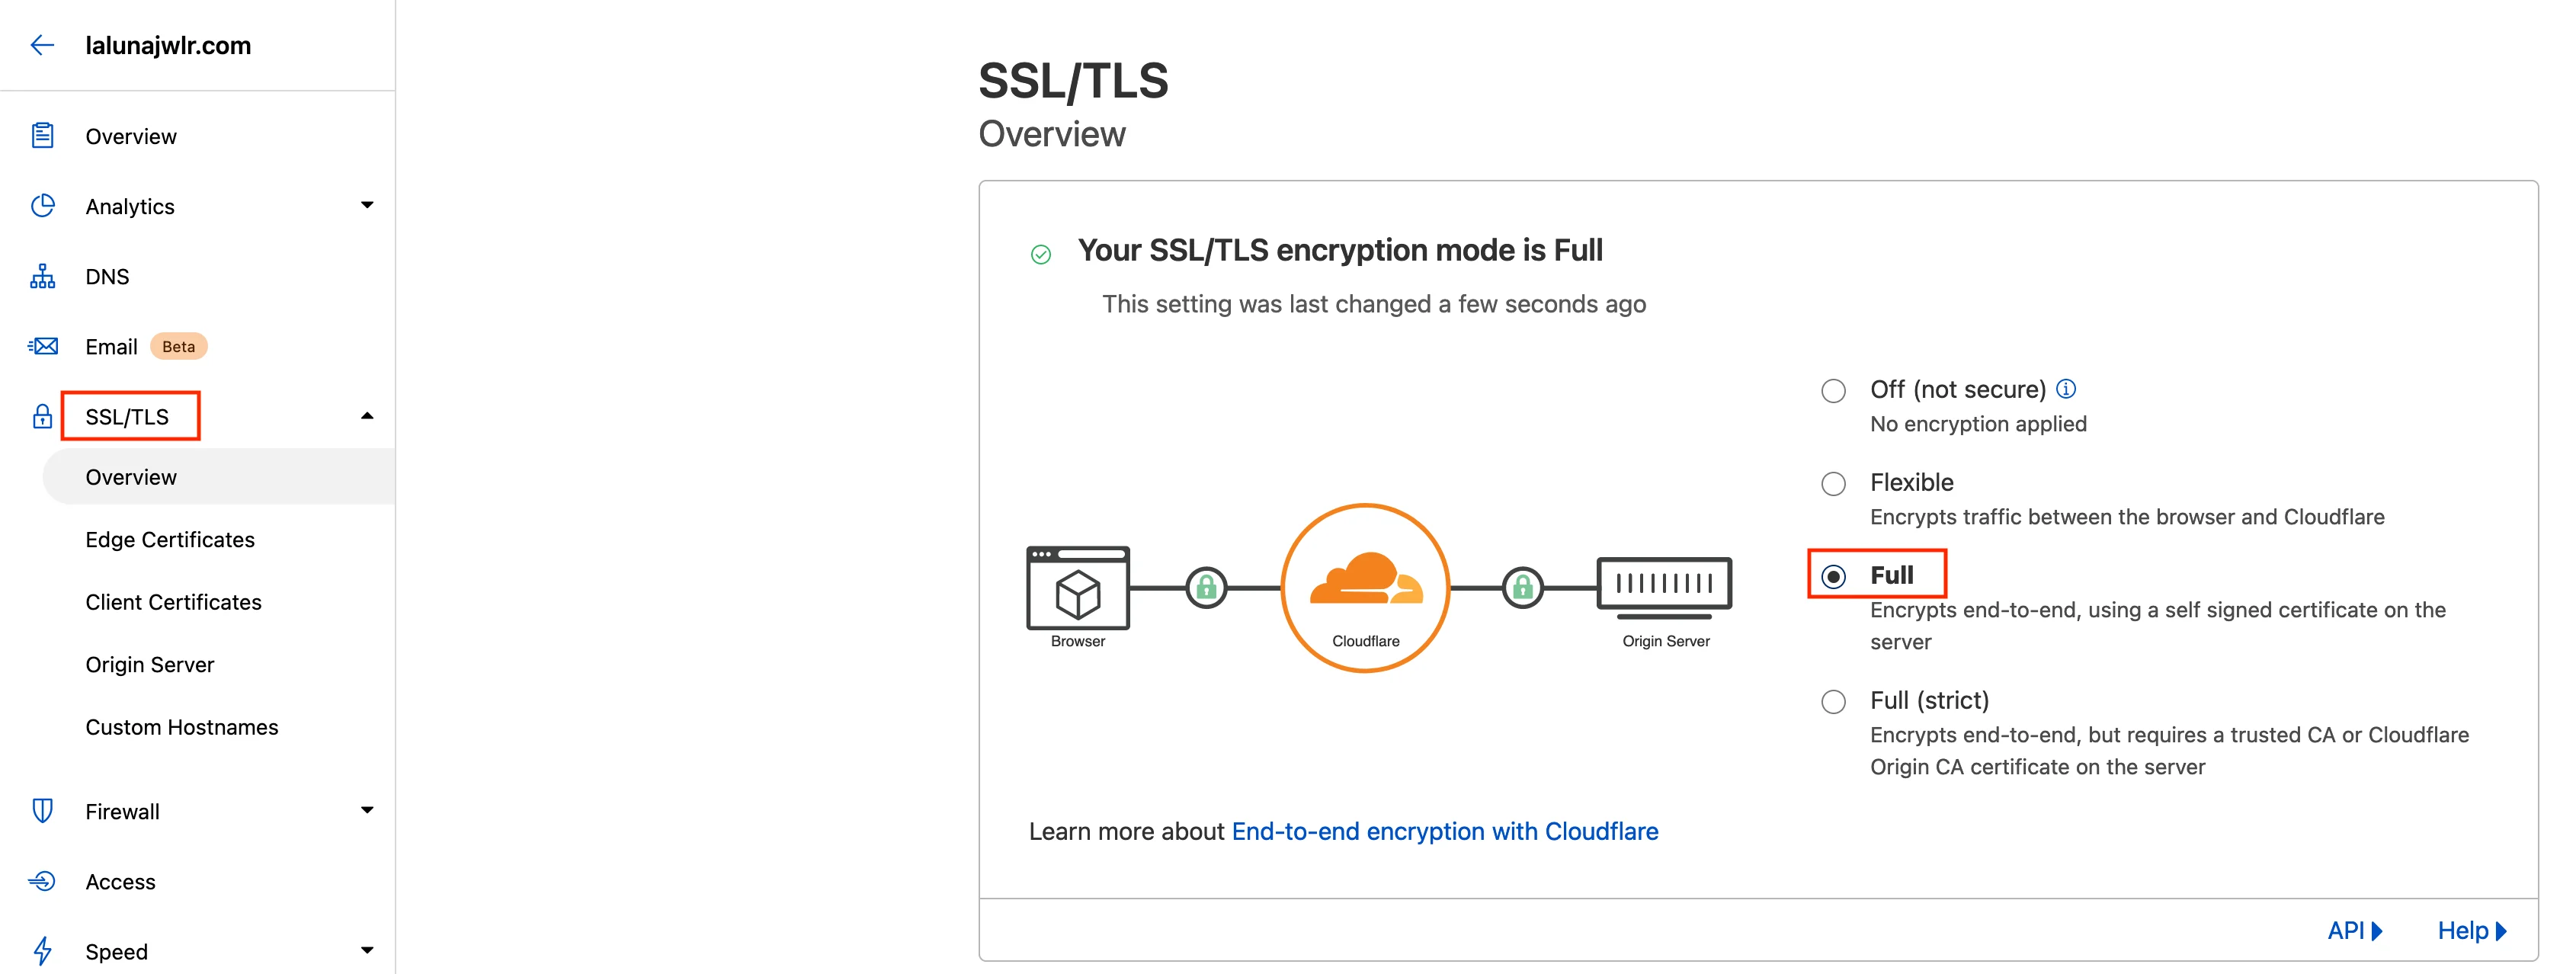
### Add CNAME Entry
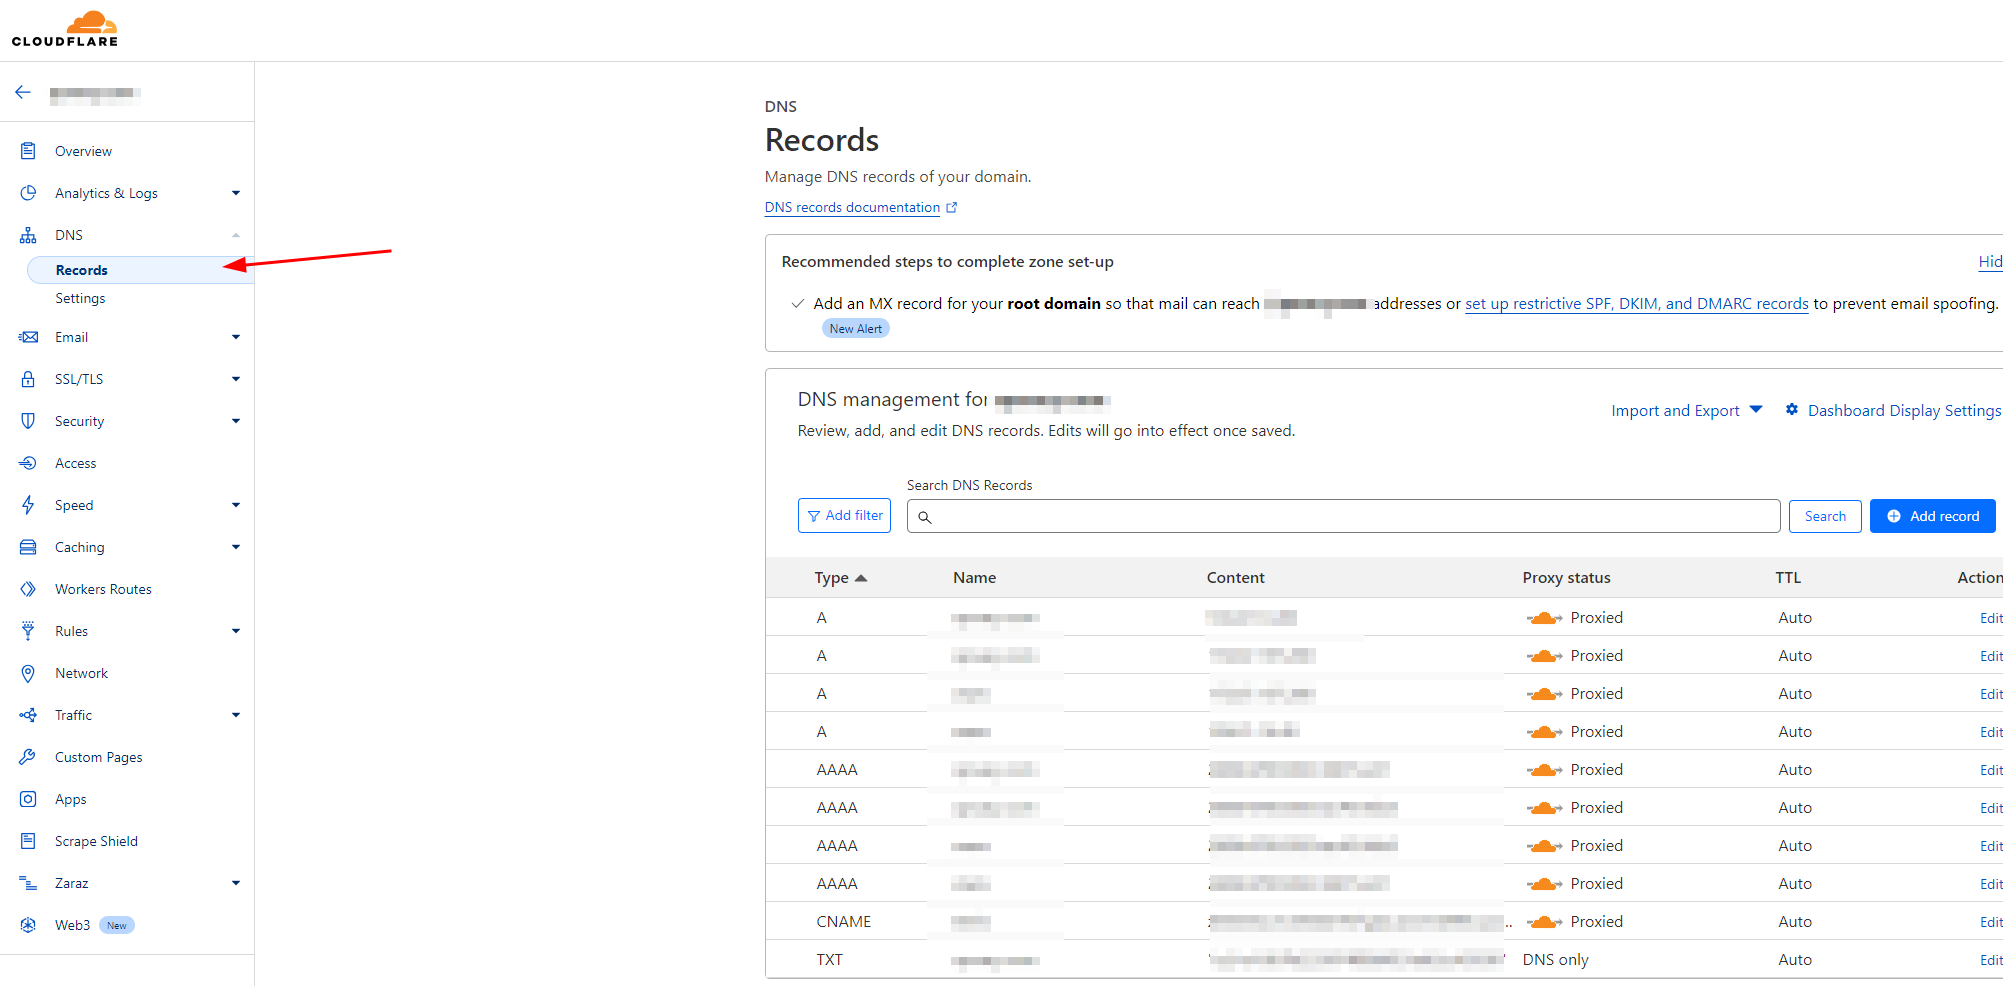
1. Go to Cloudflare DNS settings
2. Add a CNAME entry using values provided by the Qovery Console
3. The proxy mode can remain enabled
## Step 2: Configure Cloudflare DNS
### Add CNAME Entry
1. Go to Cloudflare DNS settings
2. Add a CNAME entry using values provided by the Qovery Console
3. The proxy mode can remain enabled
 ## Step 3: Configure SSL/TLS Settings
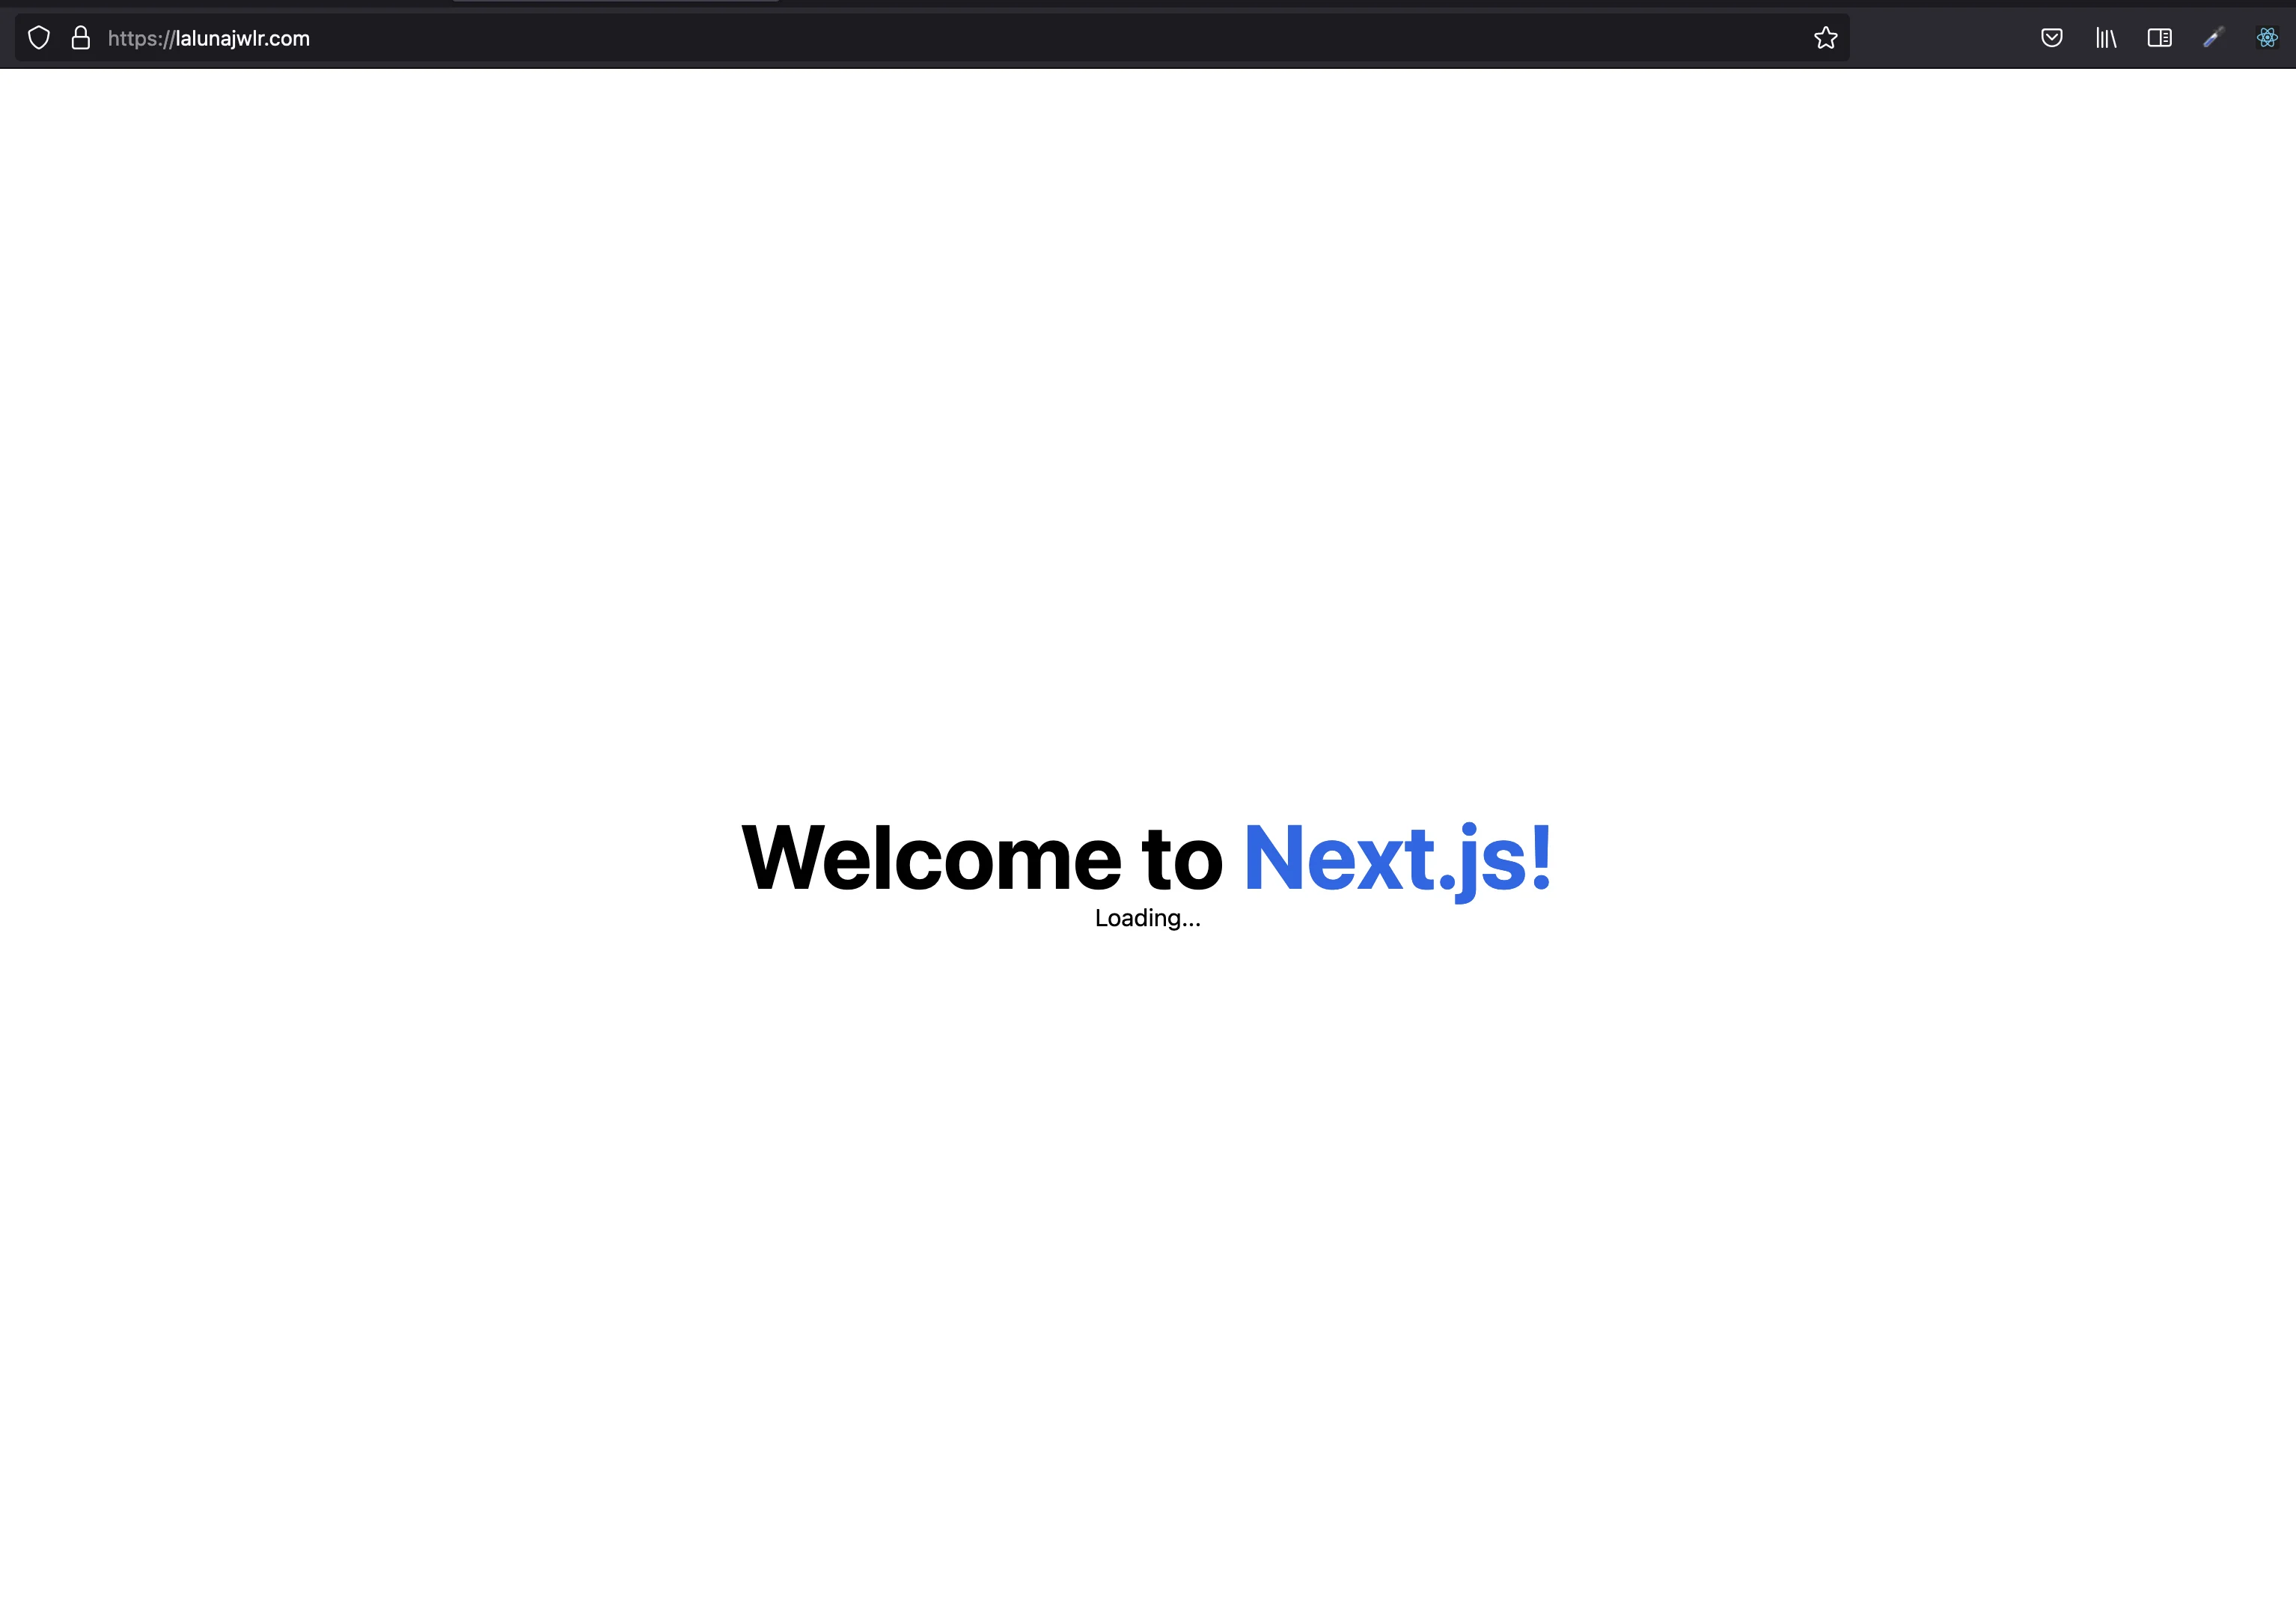
The last step to configure the domain Cloudflare side properly is to use the **Full** TLS encryption for proper custom domain functionality.
1. Navigate to **SSL/TLS** settings in Cloudflare
2. Select **Full** encryption mode
## Step 3: Configure SSL/TLS Settings
The last step to configure the domain Cloudflare side properly is to use the **Full** TLS encryption for proper custom domain functionality.
1. Navigate to **SSL/TLS** settings in Cloudflare
2. Select **Full** encryption mode
 Using "Flexible" encryption mode will not work properly with Qovery. Always use "Full" or "Full (strict)" mode.
## Step 4: Access Restriction Options
You have two options for restricting access to your application:
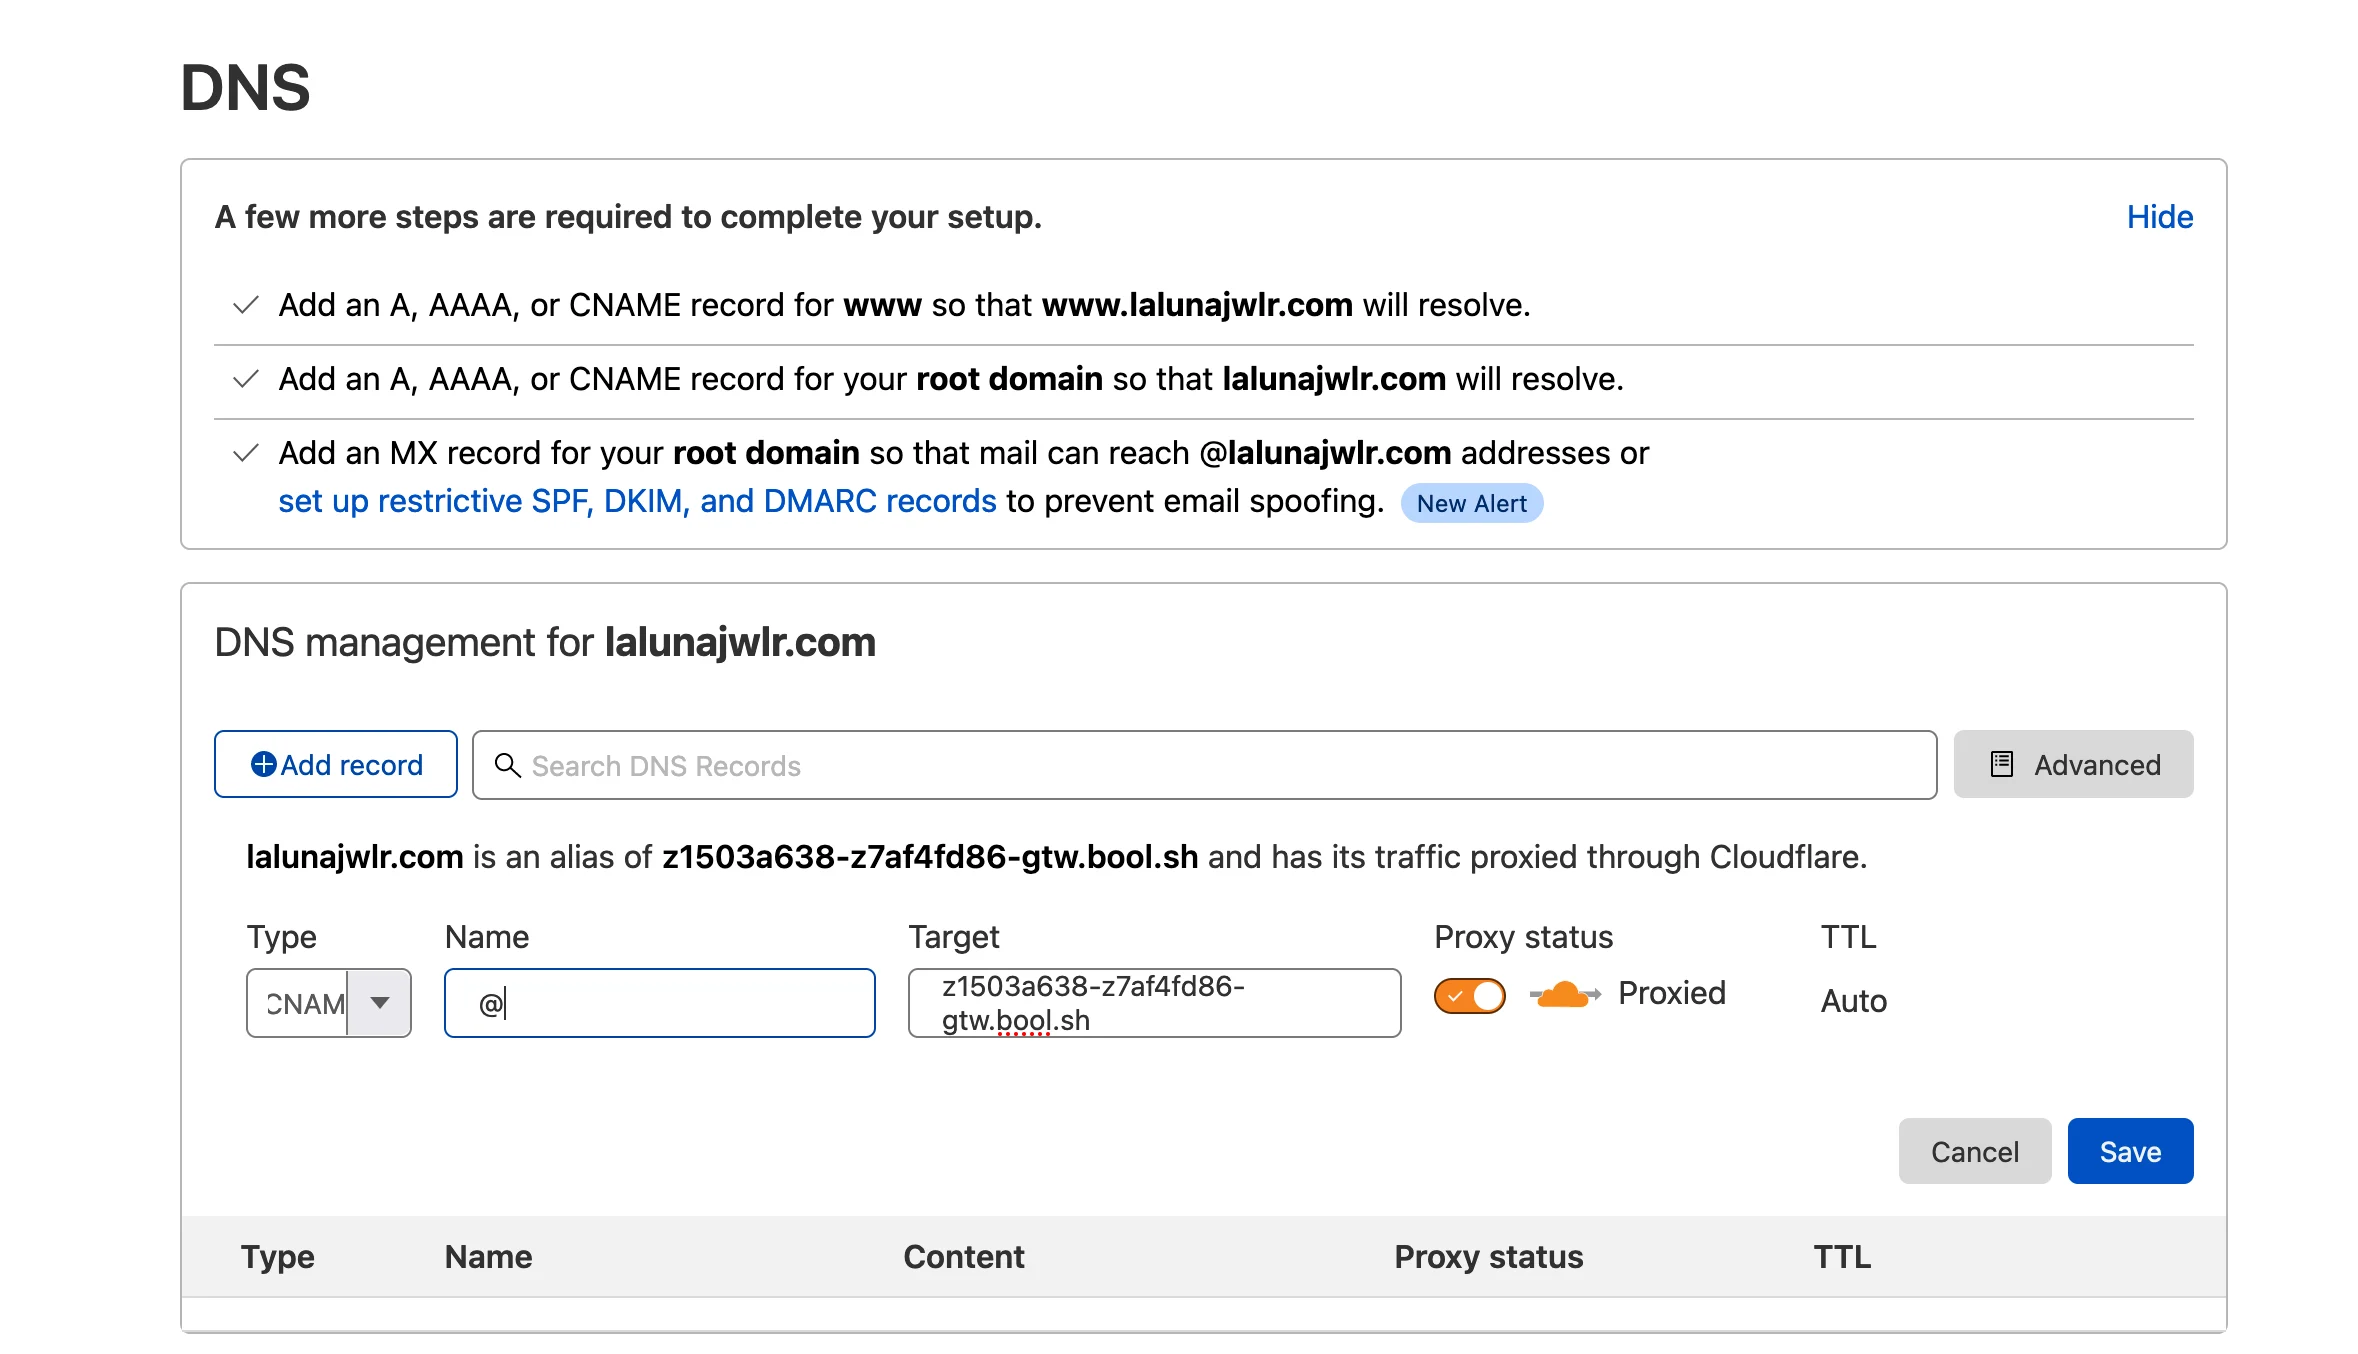
### Option 1: IP Whitelisting
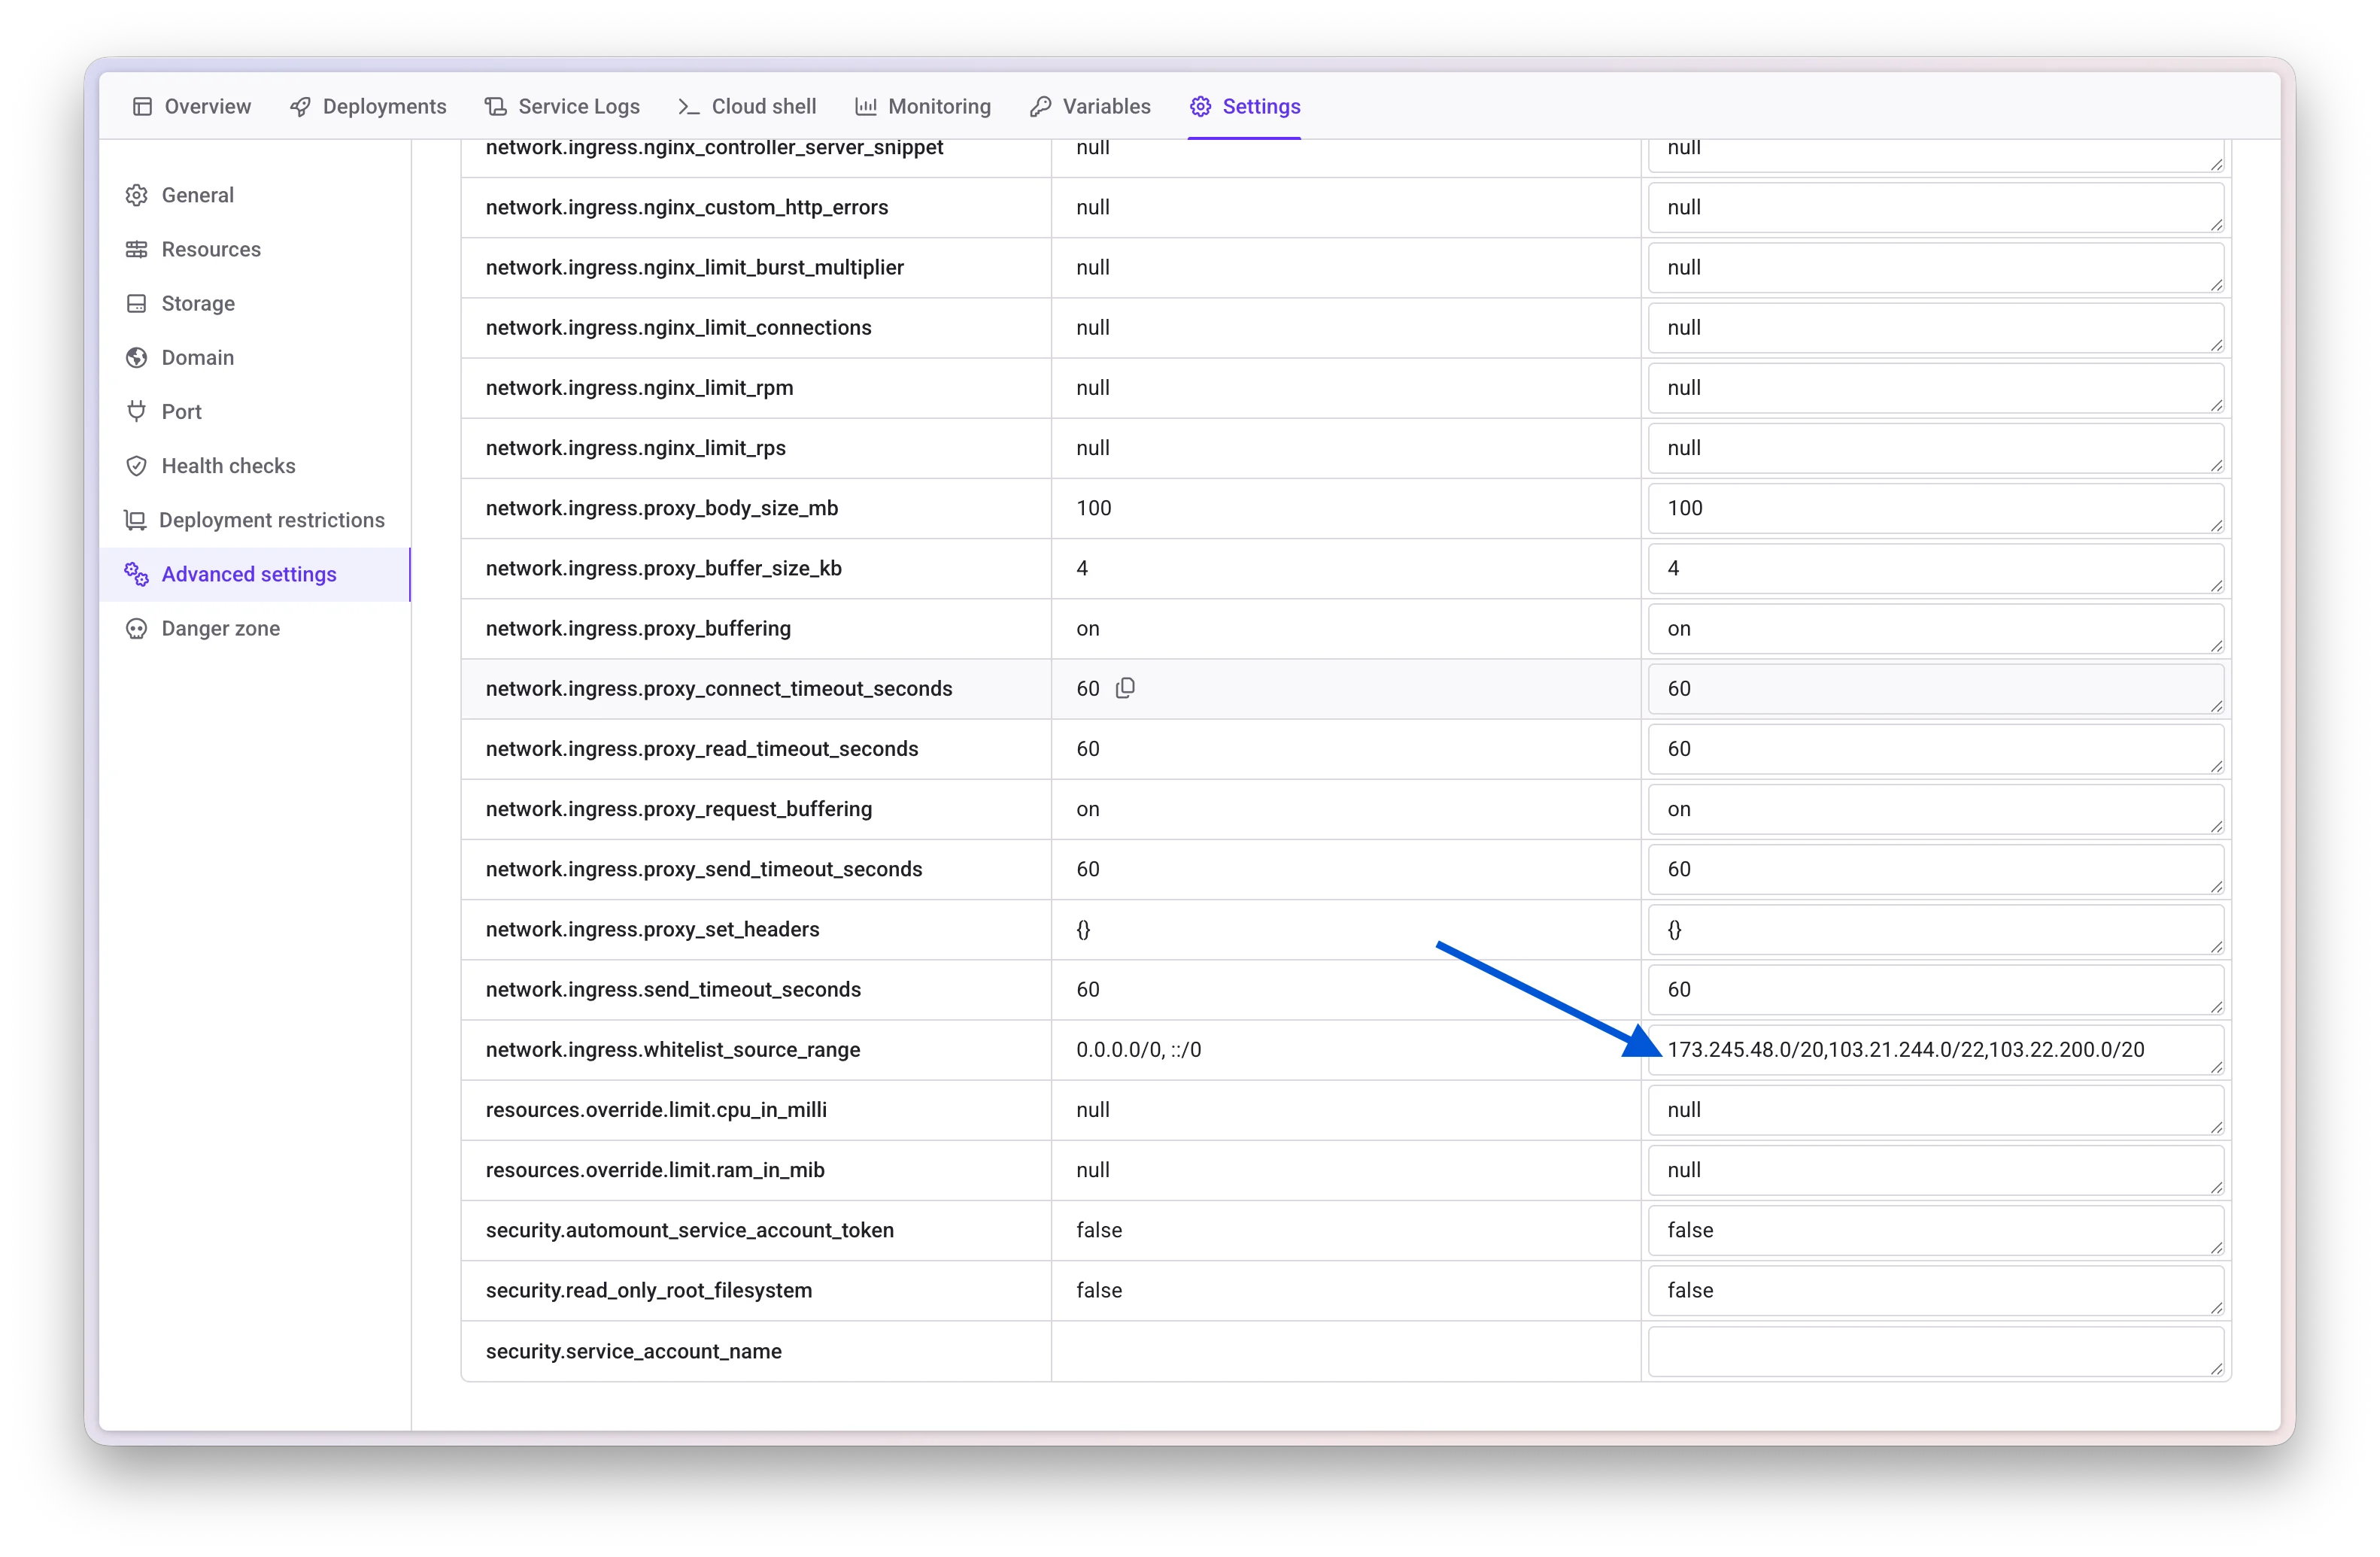
Add Cloudflare IP ranges to Qovery's advanced settings to allow only Cloudflare traffic.
Using "Flexible" encryption mode will not work properly with Qovery. Always use "Full" or "Full (strict)" mode.
## Step 4: Access Restriction Options
You have two options for restricting access to your application:
### Option 1: IP Whitelisting
Add Cloudflare IP ranges to Qovery's advanced settings to allow only Cloudflare traffic.
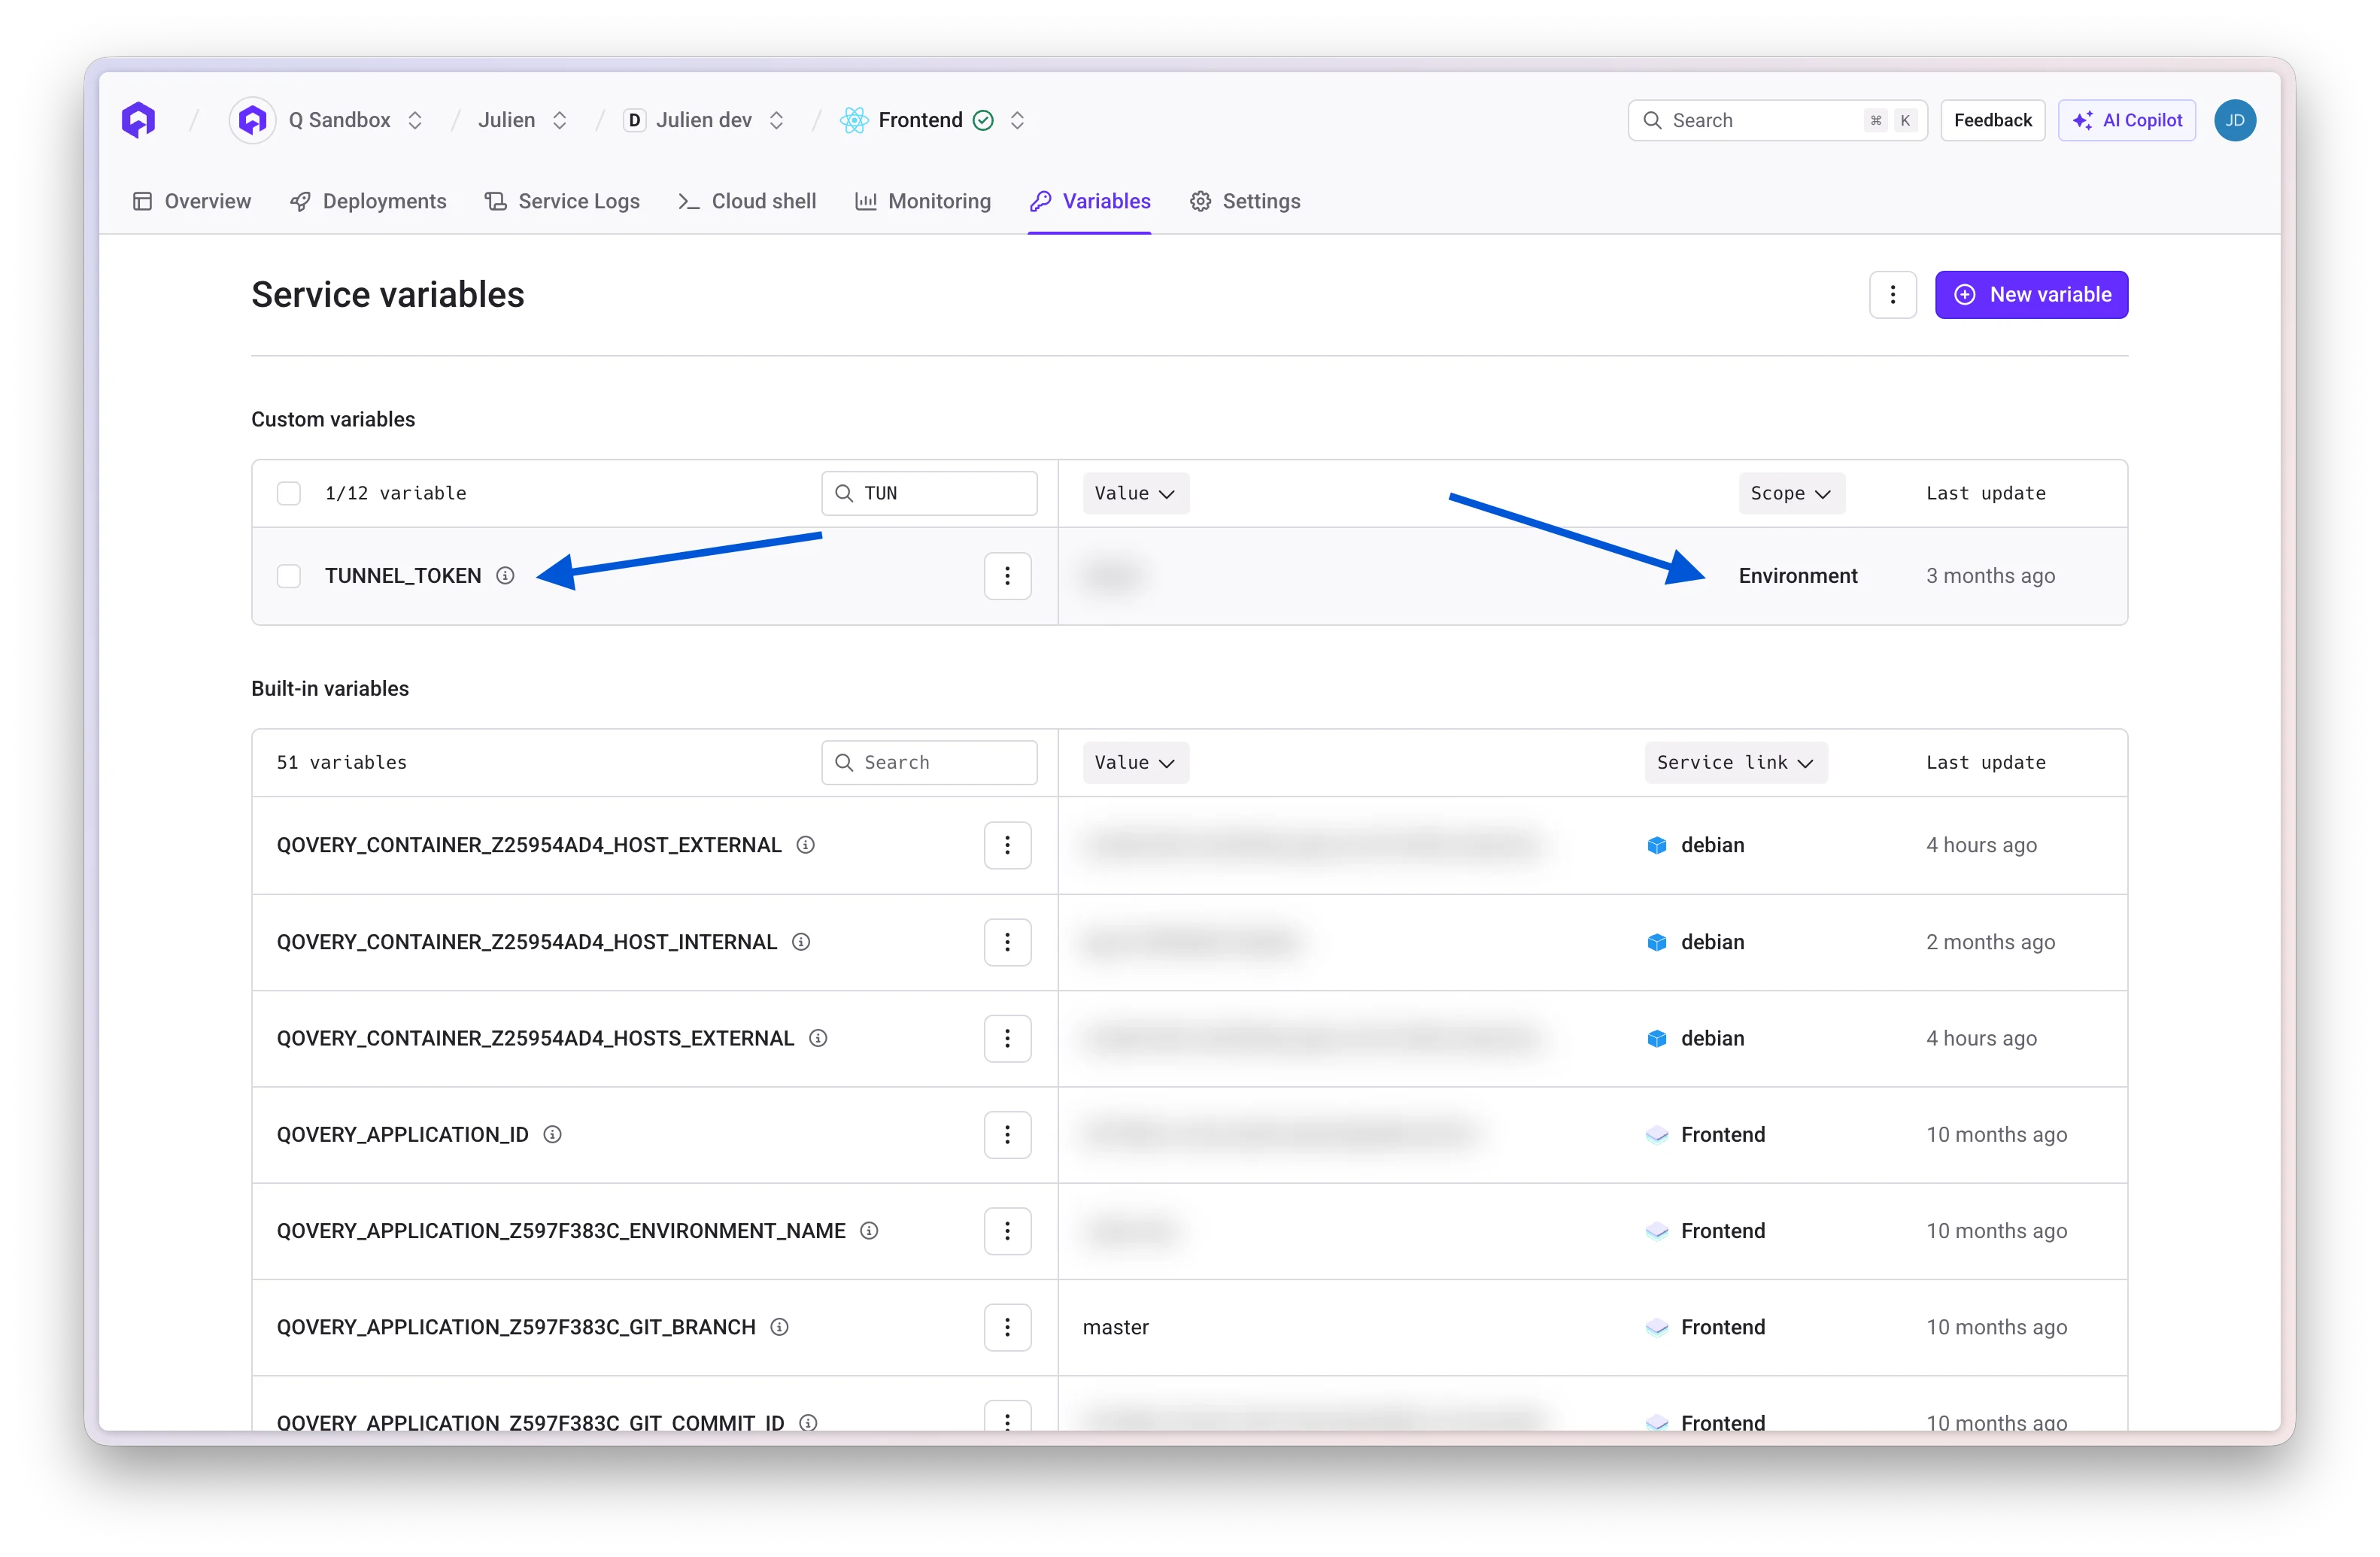
 ### Option 2: Cloudflared Tunnel
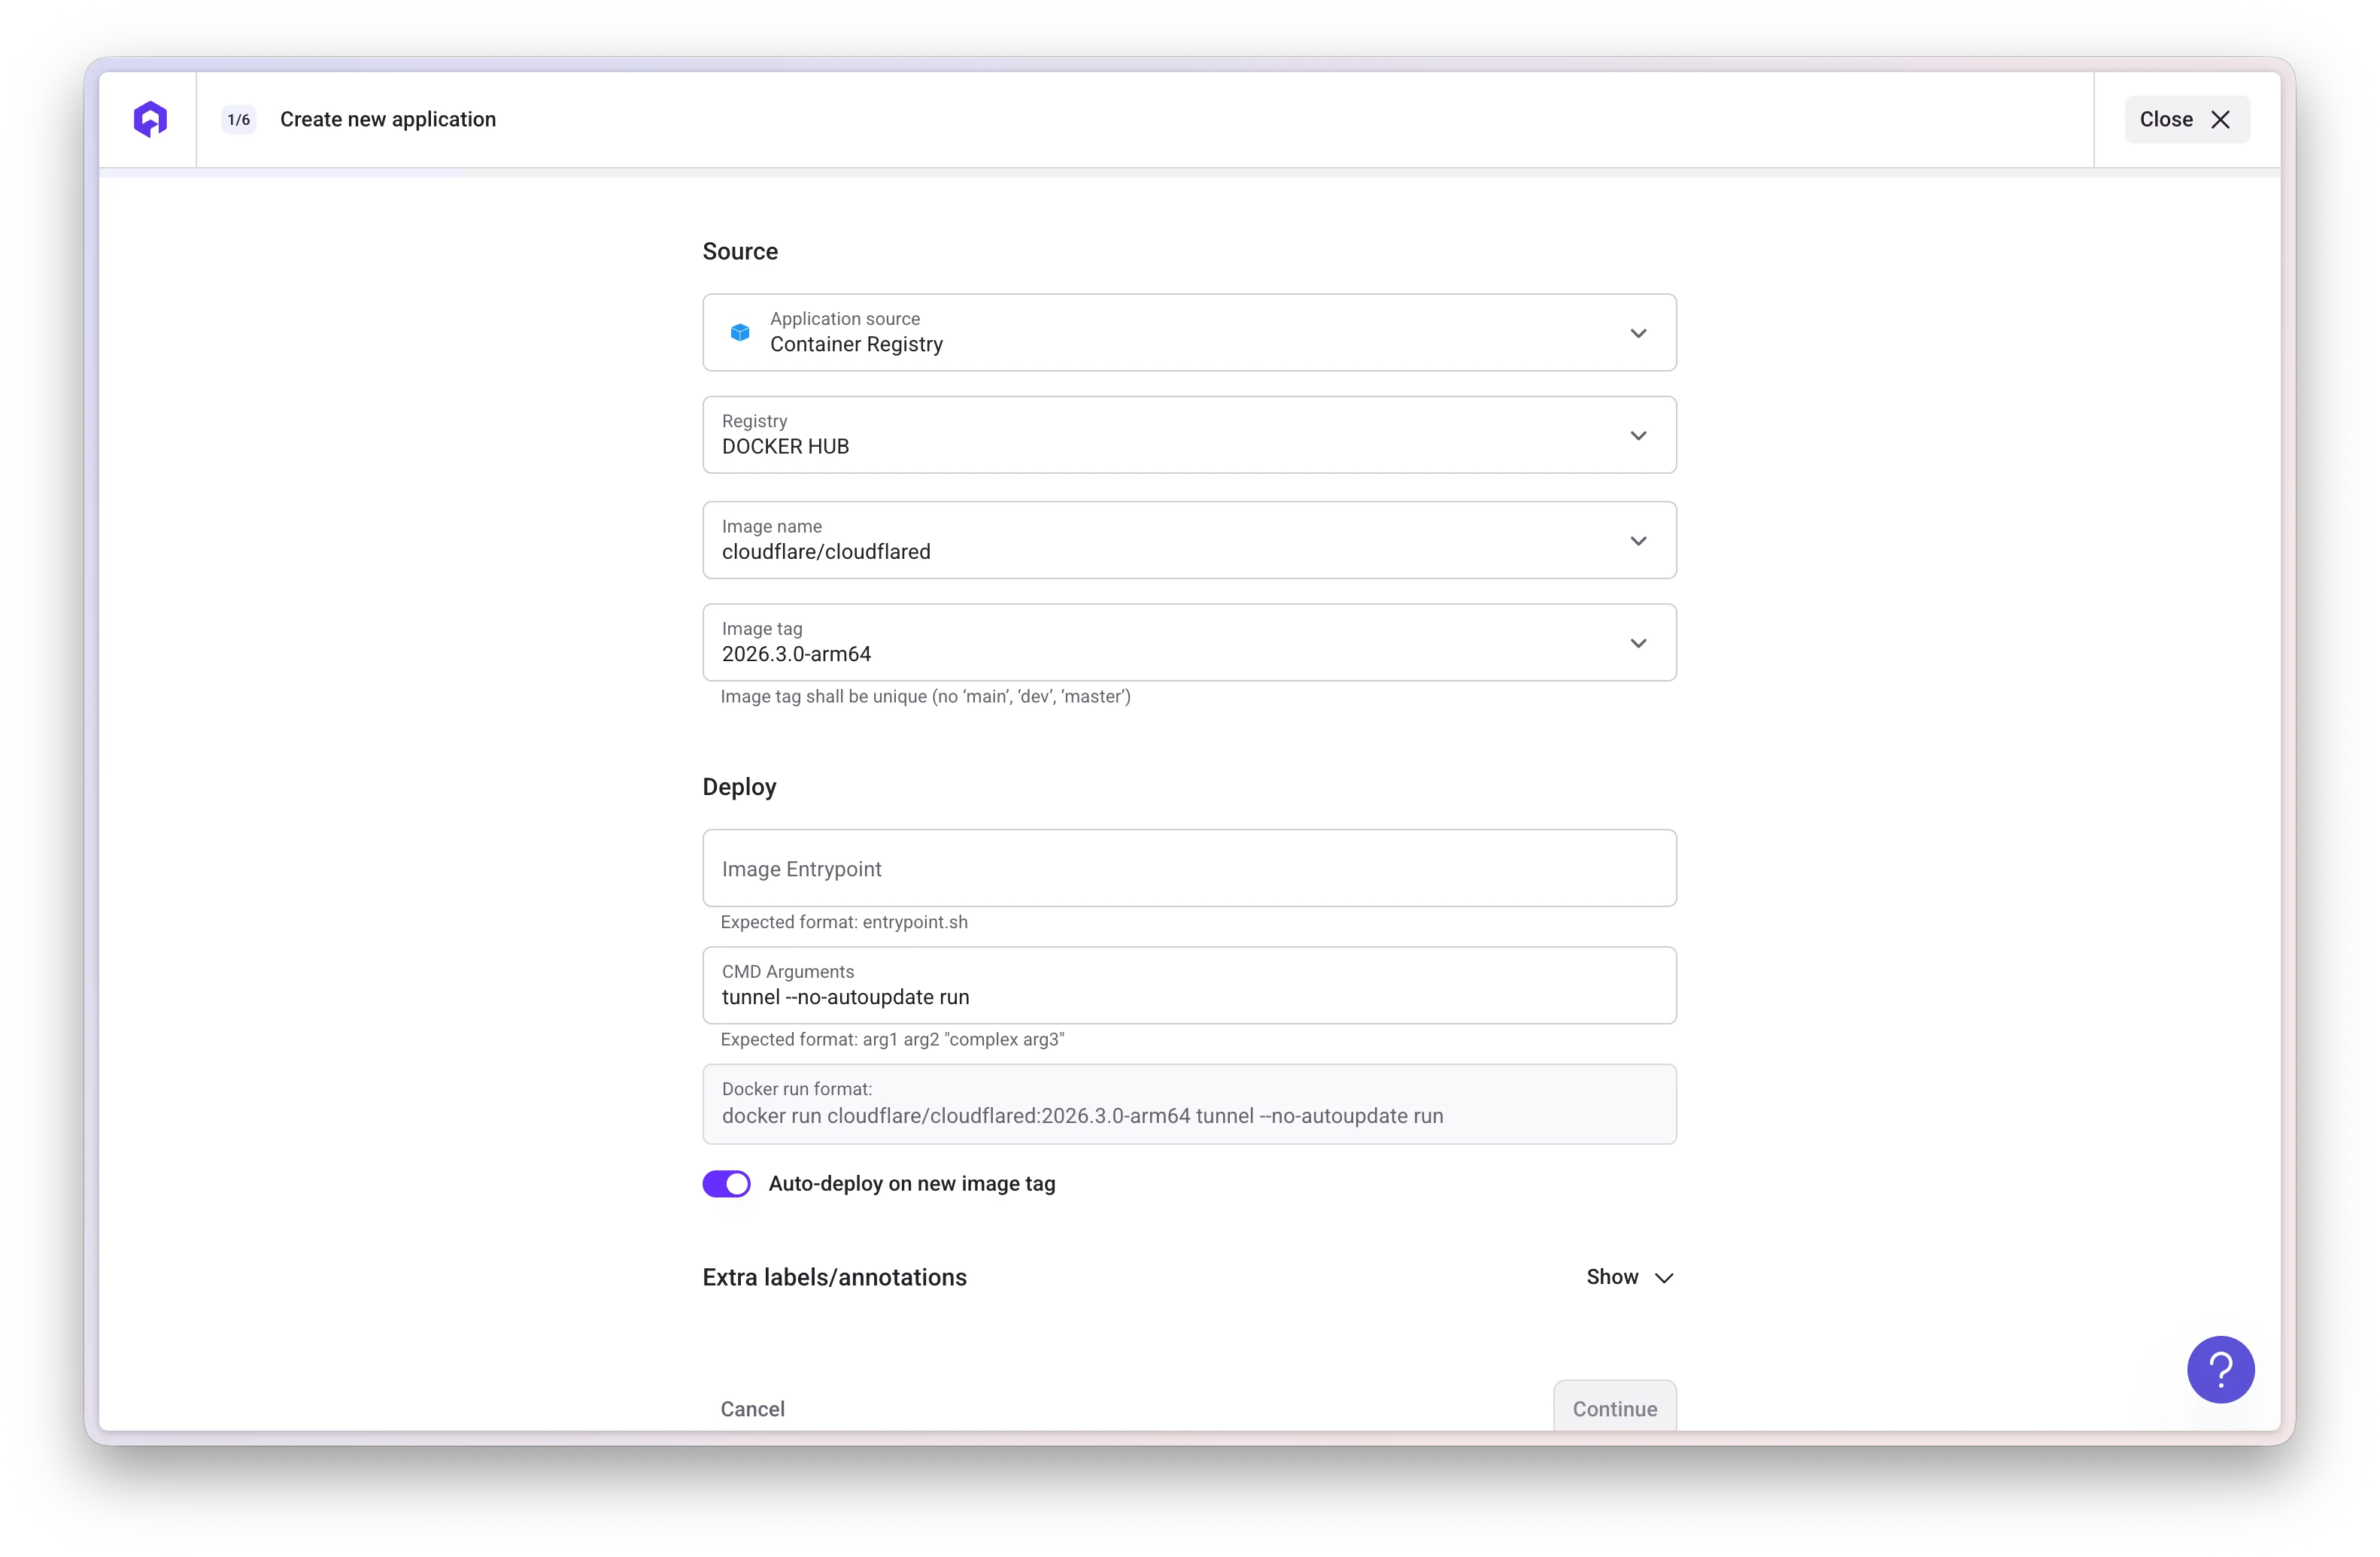
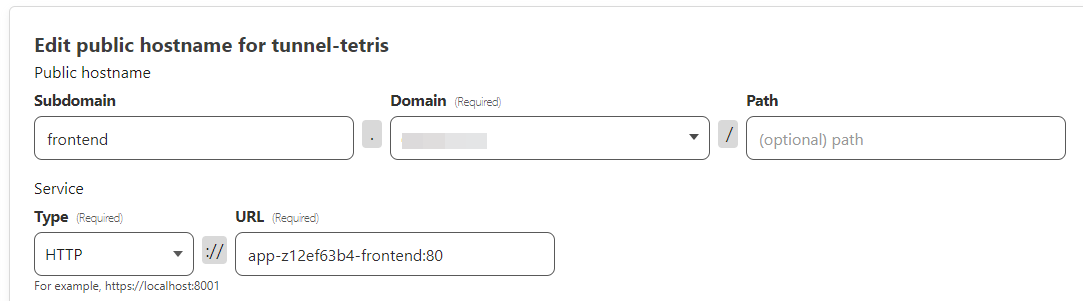
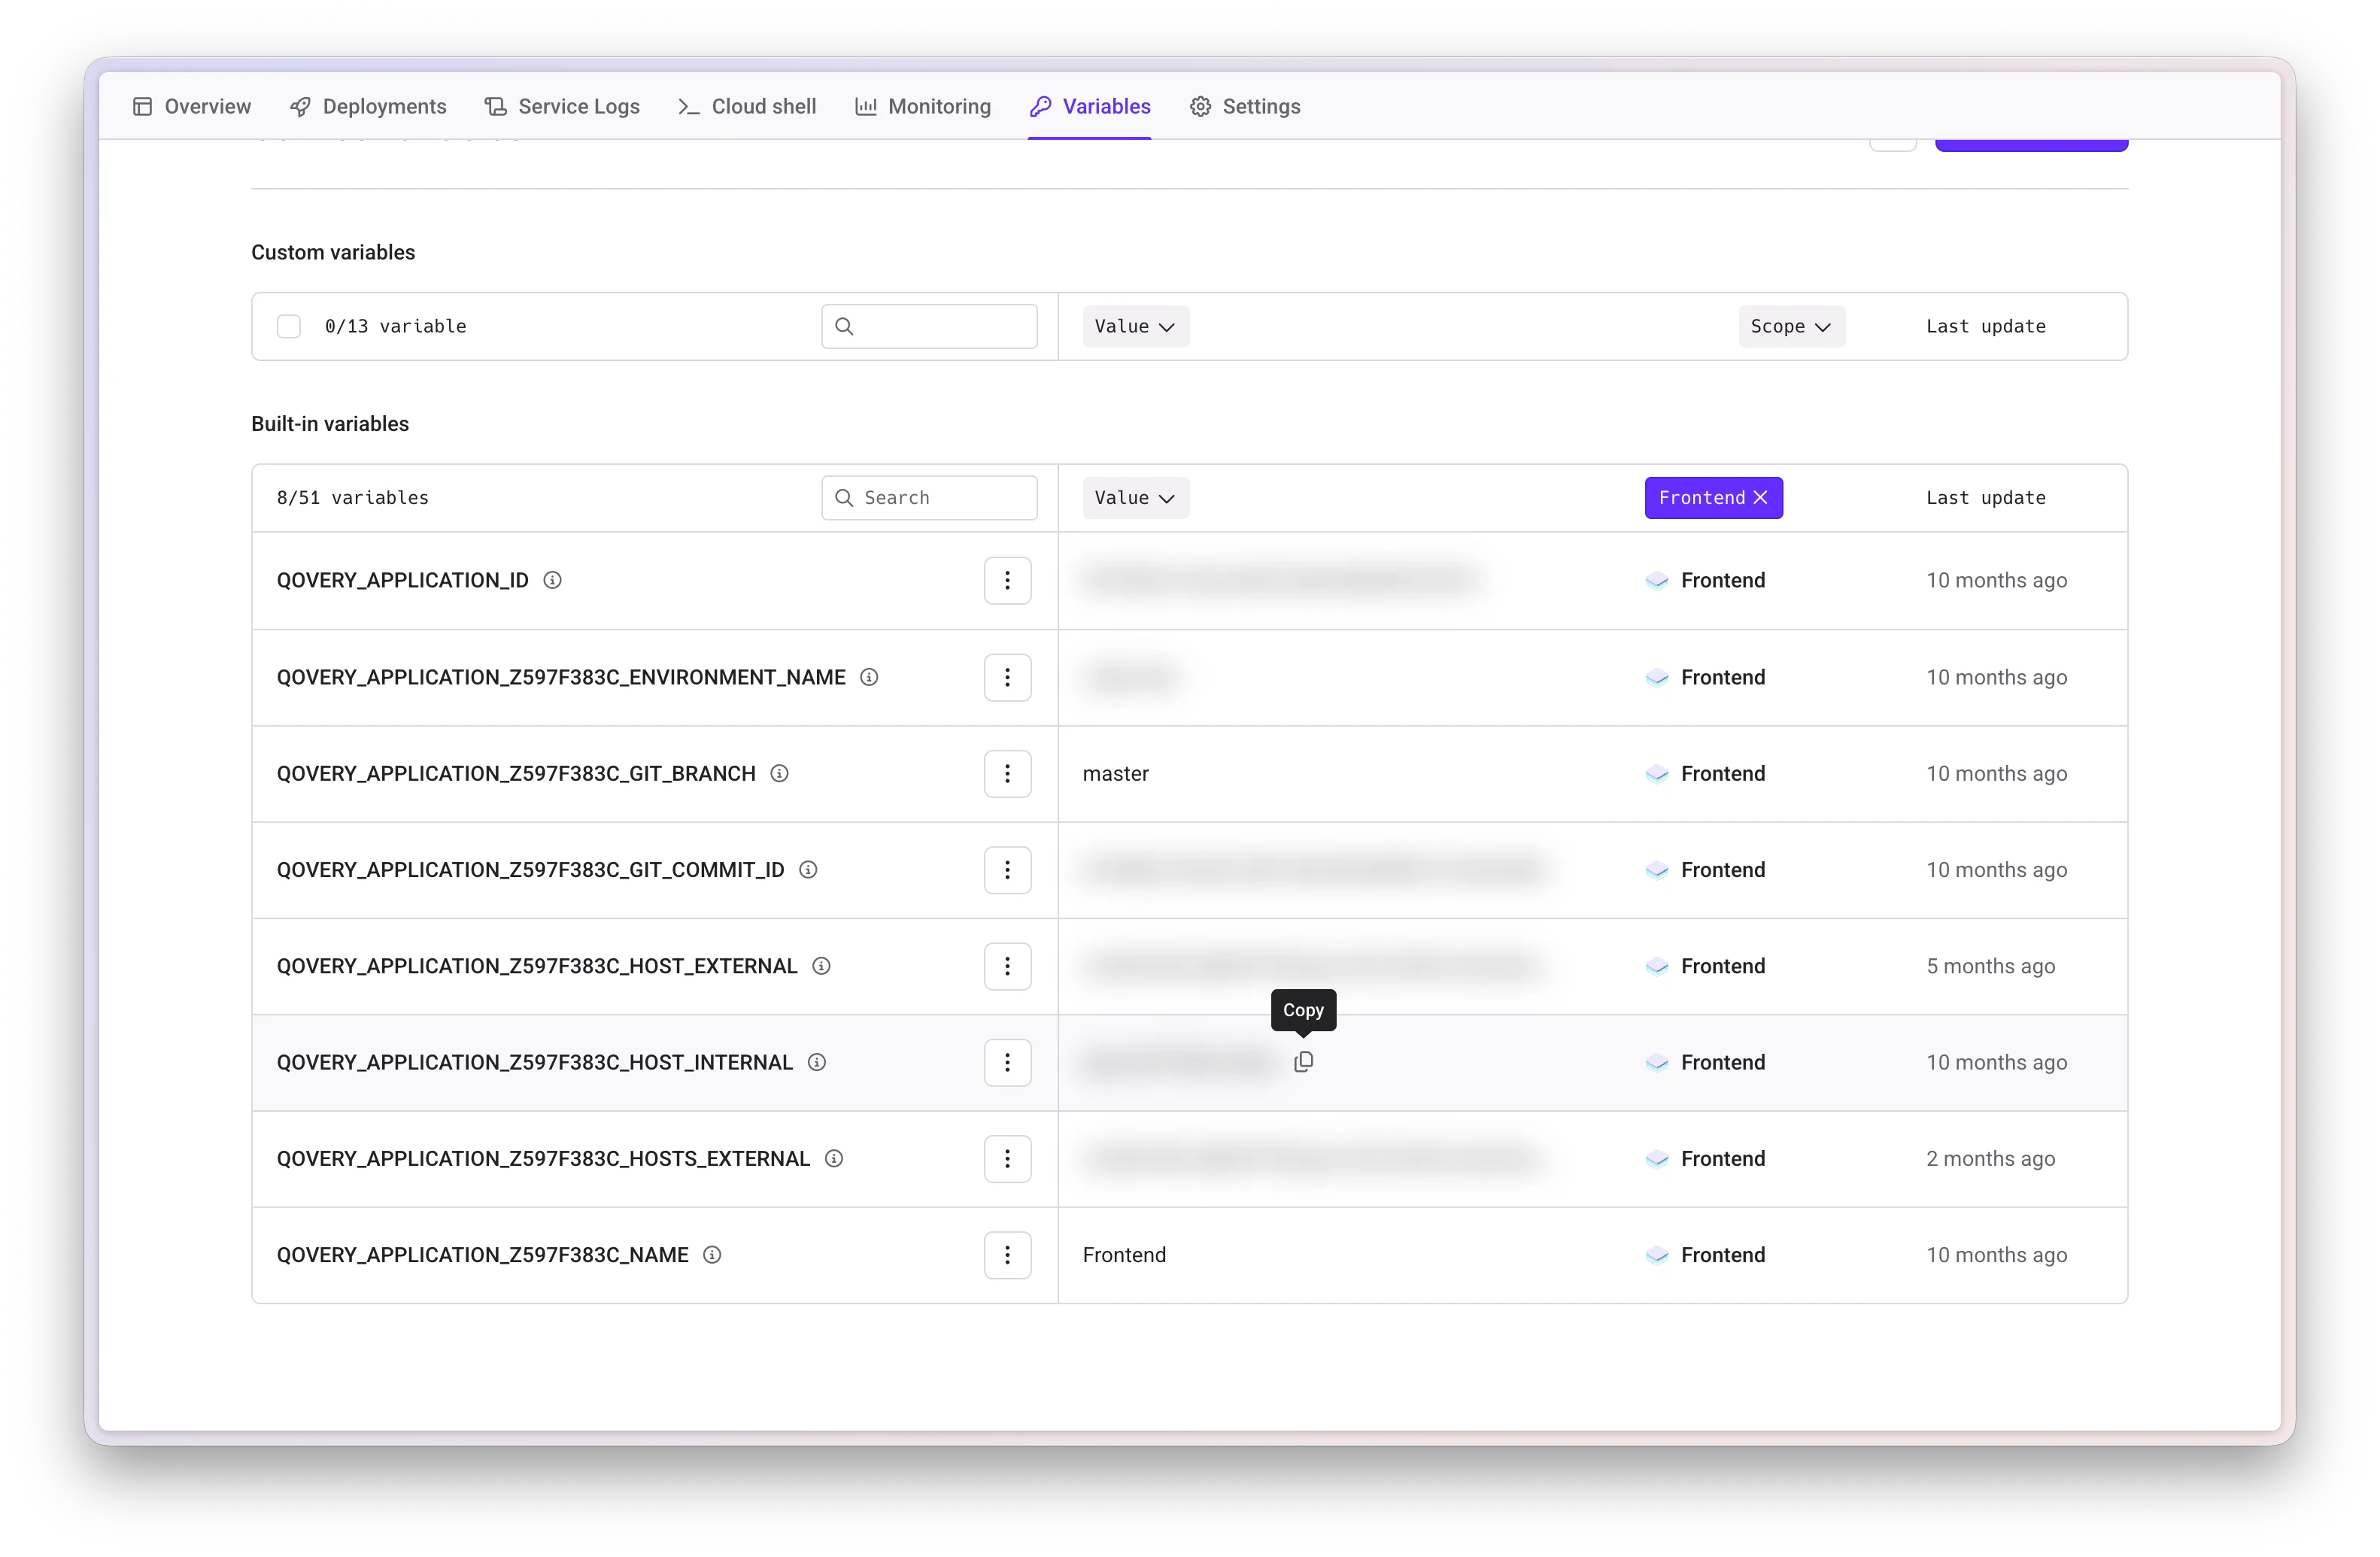
Cloudflared establishes outbound tunnels between resources and Cloudflare's network, enabling tunnel-based access without public exposure.
### Option 2: Cloudflared Tunnel
Cloudflared establishes outbound tunnels between resources and Cloudflare's network, enabling tunnel-based access without public exposure.
 ## Verification
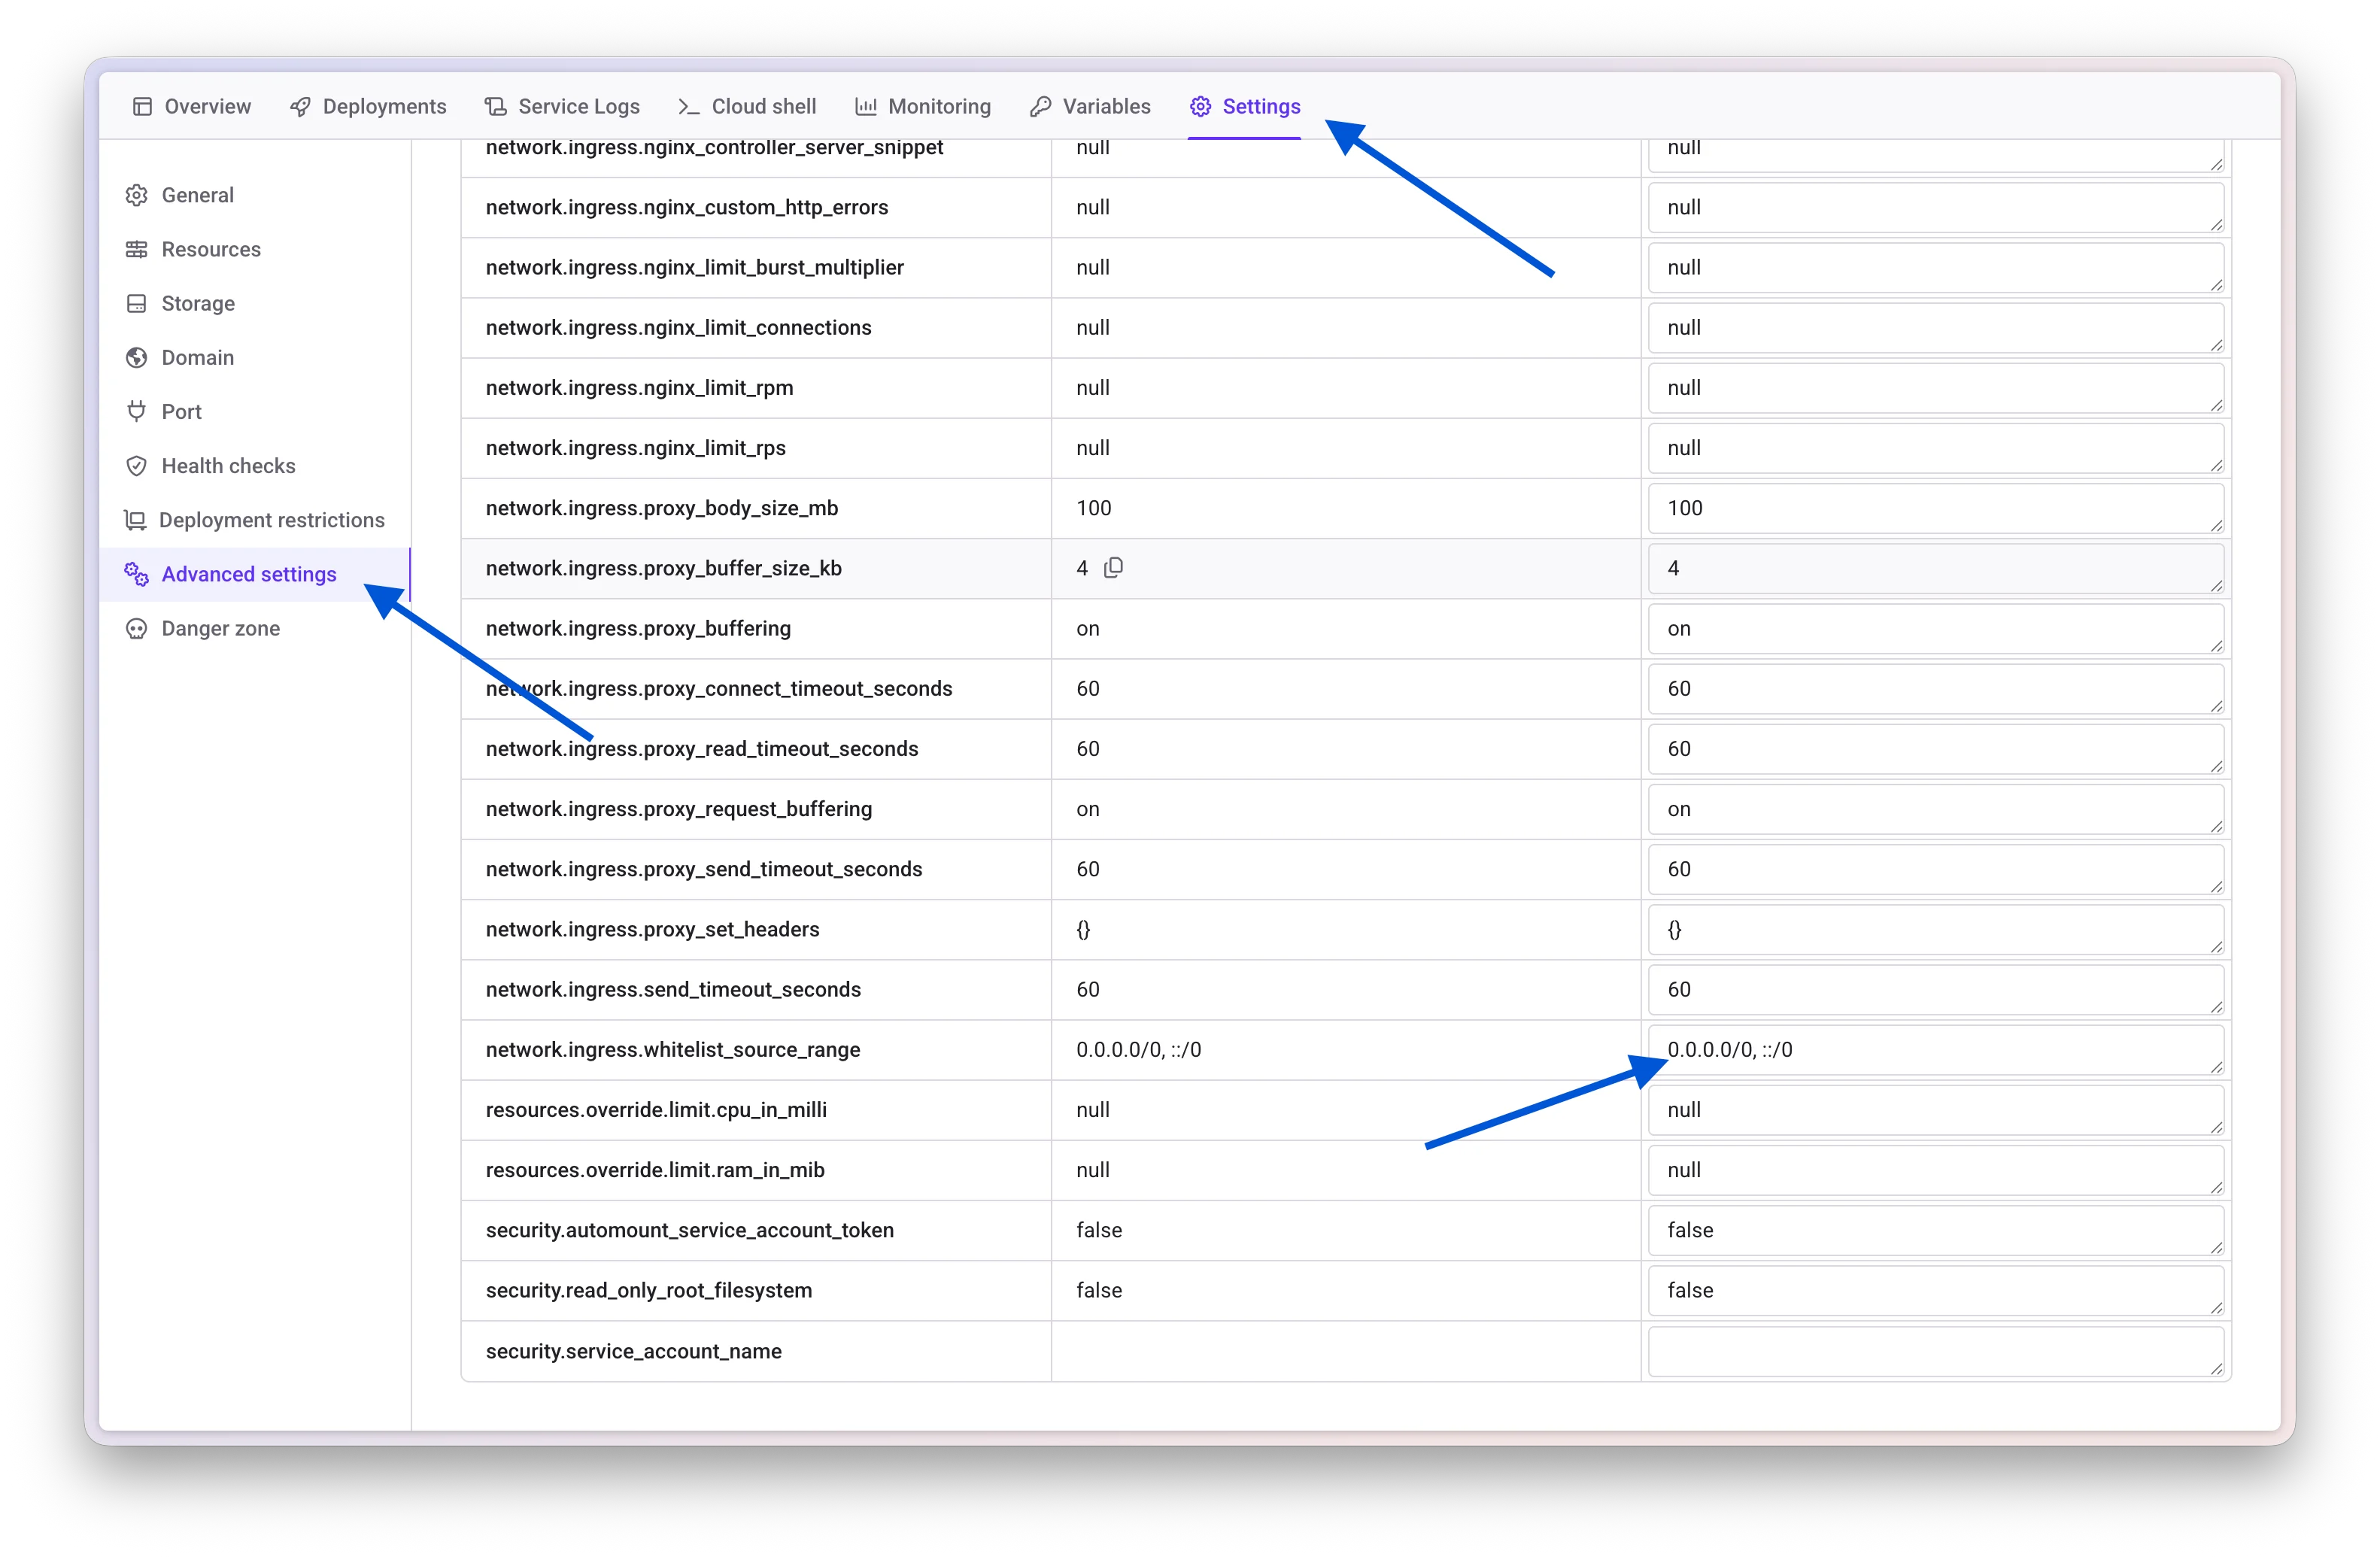
Once configured, your application should be accessible via your custom domain through Cloudflare's network.
## Verification
Once configured, your application should be accessible via your custom domain through Cloudflare's network.
 ***
## Additional Configuration
### Advanced Cloudflare Features
You can leverage Cloudflare's additional features:
***
## Additional Configuration
### Advanced Cloudflare Features
You can leverage Cloudflare's additional features:
 ***
## Troubleshooting
* Verify CNAME record is correct
* Check DNS propagation (can take up to 48 hours)
* Ensure proxy mode is enabled in Cloudflare
* Confirm "Full" encryption mode is selected
* Wait for SSL certificate provisioning (5-10 minutes)
* Check that "Domain behind a CDN" toggle is enabled in Qovery
* Verify application is running in Qovery
* Check that the CNAME points to the correct Qovery domain
* Ensure Cloudflare IP ranges are whitelisted if using IP restriction
***
## Related Documentation
Learn about custom domain configuration
Understand SSL/TLS certificate management
Configure advanced service settings
Learn about networking and ingress
***
## Troubleshooting
* Verify CNAME record is correct
* Check DNS propagation (can take up to 48 hours)
* Ensure proxy mode is enabled in Cloudflare
* Confirm "Full" encryption mode is selected
* Wait for SSL certificate provisioning (5-10 minutes)
* Check that "Domain behind a CDN" toggle is enabled in Qovery
* Verify application is running in Qovery
* Check that the CNAME points to the correct Qovery domain
* Ensure Cloudflare IP ranges are whitelisted if using IP restriction
***
## Related Documentation
Learn about custom domain configuration
Understand SSL/TLS certificate management
Configure advanced service settings
Learn about networking and ingress