

Overview
Connecting to your Kubernetes cluster with kubectl gives you direct access to manage and debug your Kubernetes resources. Qovery provides three methods to connect to your clusters:- Qovery Console Shell (Easiest) - Browser-based terminal with no local setup: cluster-level (kubectl + k9s) or service-level (shell inside a running container)
- Qovery CLI Method (Recommended) - Quick and easy access with automated configuration
- AWS CLI Method (Traditional) - Manual setup for advanced users who need full control
Method 1: Using Qovery Console Shell (Easiest)
The Qovery Console provides the fastest way to access your cluster or a running service container, directly from your browser with no local setup required. No prerequisites needed - just your browser and Qovery Console access. The Console Shell is available at two levels:- Cluster level: a web terminal pre-configured with kubectl and k9s for full cluster access
- Service level: a web terminal that opens a session inside a running container of a specific service
Cluster-Level Shell
Use this when you need to inspect or manage Kubernetes resources across the entire cluster.1
Navigate to Your Cluster
Open your Qovery Console, go to Organization > Clusters, and select your cluster.
2
Open Cloud Shell
Click the Cloud Shell tab to open an embedded browser-based terminal.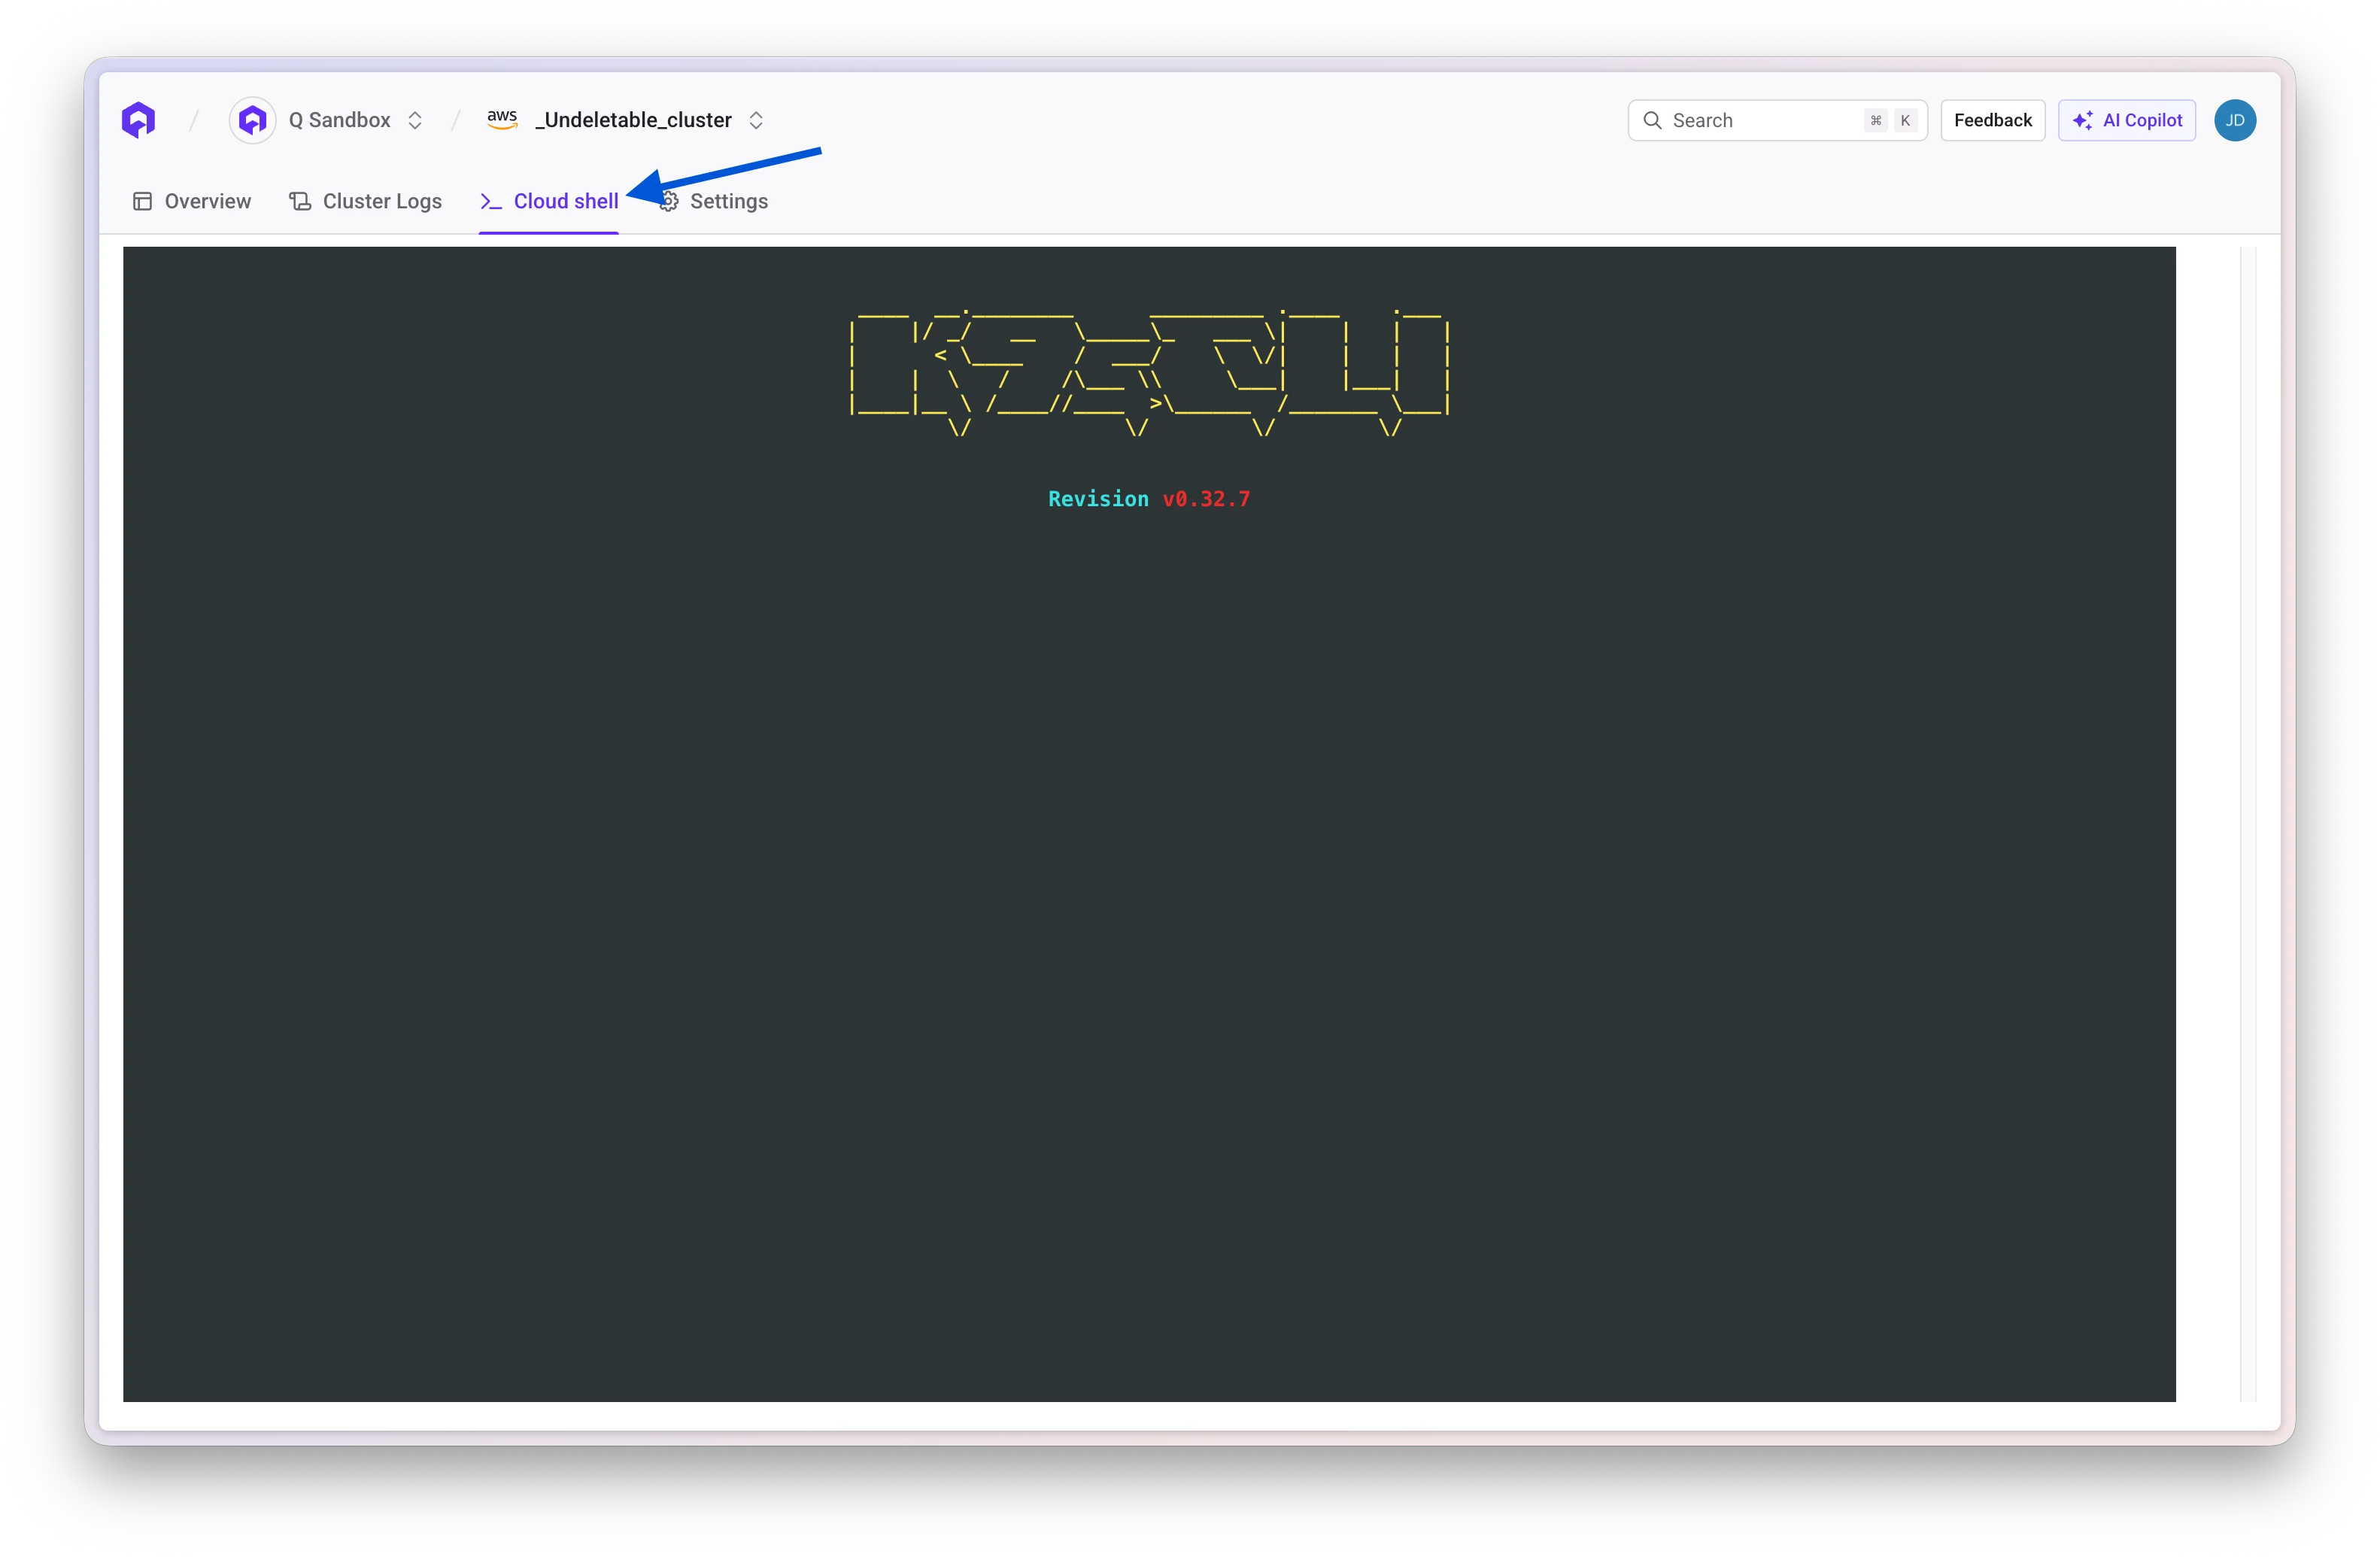
3
Use k9s or kubectl
The shell opens with k9s by default, giving you a powerful terminal UI for Kubernetes. You can also use kubectl commands directly:
The cluster-level Cloud Shell comes pre-configured with: k9s for interactive Kubernetes cluster management, kubectl with cluster credentials automatically configured, and no local installation required.
Service-Level Shell
Use this when you need to inspect or debug a running container directly: run one-off commands, check environment variables, inspect files, or run a database migration.1
Navigate to Your Service
Open your Qovery Console, go to the relevant environment, and click on the service you want to connect to.
2
Open Cloud Shell
Click the Cloud Shell tab. Qovery opens a terminal session inside a running container of that service.
3
Run Commands Inside the Container
You now have a shell directly inside your container. Common use cases:
The service-level shell connects to an existing running container. If no container is running (e.g. the service is stopped), the shell will not be available.
Method 2: Using Qovery CLI (Recommended for Local Development)
Prerequisites
Before using Qovery CLI, ensure you have:- Qovery CLI installed
- An existing cluster managed by Qovery
- kubectl installed (installation guide)
- Access to the Qovery organization and cluster
Quick Access
The Qovery CLI offers two powerful commands for cluster access:qovery cluster kubeconfig - Full Cluster Access
qovery cluster kubeconfig - Full Cluster Access
Downloads the kubeconfig file for complete cluster access. Use this when you need to:
- Run kubectl commands directly
- Deploy resources to multiple namespaces
- Manage cluster-wide resources
- Integrate with other tools (Helm, k9s, etc.)
qovery cluster debug-pod - Interactive Debug Shell
qovery cluster debug-pod - Interactive Debug Shell
Opens an interactive debug pod with kubectl pre-configured. Use this when you need to:
- Quick troubleshooting without local setup
- Debug network connectivity from within the cluster
- Test service discovery and DNS resolution
- Run diagnostic commands in the cluster context
Option A: Get Kubeconfig File
This method downloads the kubeconfig file to your local machine for full kubectl access.1
Authenticate with Qovery
Log in to your Qovery account:Follow the browser authentication flow or use headless mode:
2
List Available Clusters
Find your cluster ID:Example output:
3
Download Kubeconfig
Get the kubeconfig for your cluster:The command will:
- Generate a kubeconfig file
- Save it to your current directory
- Display the file location
4
Configure kubectl
Set the KUBECONFIG environment variable:Or merge with your existing kubeconfig:
5
Verify Connection
Test your cluster access:You should see your cluster nodes listed.
Option B: Open Debug Pod
For quick troubleshooting without local setup, use the debug pod feature:1
Open Debug Pod
Launch an interactive debug shell:This opens a pod with:
- kubectl pre-configured
- Common debugging tools
- Network access to cluster services
2
Run kubectl Commands
You can now run kubectl commands directly:
3
Exit Debug Pod
When finished, exit the debug pod:
Method 3: Using AWS CLI (Advanced)
For users who need full control or want to use AWS IAM directly, you can configure kubectl using the AWS CLI. This method requires more manual setup but provides flexibility.This method is recommended for advanced users who need custom IAM
configurations or want to integrate with existing AWS tooling.
Prerequisites
Before using AWS CLI method, ensure you have:- AWS CLI installed
- kubectl installed
- Qovery CLI installed
- IAM user with appropriate permissions
- An existing EKS cluster managed by Qovery
Setup IAM Permissions
1
Configure IAM Access
Add your IAM user to the cluster’s admin group. There are two ways to do this:Option A: AWS Console
- Navigate to AWS IAM Console
- Find the IAM user you’ll use for kubectl access
- Add the user to the cluster’s “Admins” group created by Qovery
- Go to your Qovery cluster settings
- Navigate to Advanced Settings
- Enable SSO authentication for the cluster
2
Configure AWS CLI Credentials
Set up your AWS credentials:Enter your:
- AWS Access Key ID
- AWS Secret Access Key
- Default region (match your cluster region)
- Default output format (json recommended)
3
Verify AWS Access
Confirm AWS CLI is working:This should return your IAM user information.
Configure kubectl
1
Download Kubeconfig with Qovery CLI
Even with AWS CLI method, use Qovery CLI to get the initial kubeconfig:
2
Set kubectl Context
Configure kubectl to use the downloaded config:Verify the context:
3
Test Cluster Access
Verify you can access the cluster:If successful, you’ll see the list of nodes in your cluster.
Update kubeconfig with AWS CLI
If you need to regenerate the kubeconfig using AWS CLI directly:Working with Applications
Once connected, you can manage your applications directly with kubectl.Find Your Application Namespace
Qovery creates a unique namespace for each environment:1
List All Namespaces
2
Identify Your Namespace
Find your namespace ID from the Qovery Console URL:Look for a namespace like:
z<environment-id>3
Set Default Namespace
Set the namespace as default for convenience:
View Application Pods
List pods in your application namespace:Access Application Logs
View logs from your application pods:Shell into Application Container
Open an interactive shell in your application container:Common Operations
Port Forwarding
Forward a local port to a pod port:The Qovery CLI also provides a
qovery port-forward command that can be
easier to use. See qovery port-forward for
details.Describe Resources
Get detailed information about resources:Check Resource Usage
Monitor resource consumption:View Events
Check cluster and namespace events:Troubleshooting
Connection Issues
Unable to Connect to Cluster
Unable to Connect to Cluster
Symptoms:
Unable to connect to the server errorSolutions:- Verify cluster is running:
qovery cluster status --cluster <cluster-id> - Check your kubeconfig path:
echo $KUBECONFIG - Ensure AWS credentials are valid:
aws sts get-caller-identity - Regenerate kubeconfig:
qovery cluster kubeconfig --cluster-id <cluster-id>
Authentication Failed
Authentication Failed
Symptoms:
error: You must be logged in to the server (Unauthorized)Solutions:- Re-authenticate with Qovery:
qovery auth - Verify IAM permissions for AWS CLI method
- Check if your IAM user is in the cluster admin group
- Ensure SSO is enabled if using SSO authentication
Forbidden Access
Forbidden Access
Symptoms:
Error from server (Forbidden): <resource> is forbiddenSolutions:- Verify your IAM user has necessary permissions
- Check RBAC roles:
kubectl get rolebindings --namespace <namespace> - Ensure you’re using the correct namespace
- Contact your organization admin for access
Namespace Not Found
Namespace Not Found
Symptoms:
Error from server (NotFound): namespaces "<namespace>" not foundSolutions:- List all namespaces:
kubectl get namespaces - Verify environment ID from Qovery Console
- Ensure environment is deployed
- Check if namespace starts with ‘z’ prefix
Debug Commands
Useful commands for diagnosing issues:Security Best Practices
Do’s and Don’ts
DO
- Use Qovery CLI method when possible
- Read cluster resources for debugging
- View logs and describe resources
- Use debug pods for troubleshooting
- Keep kubeconfig files secure
DON'T
- Modify Qovery-managed resources directly
- Delete resources created by Qovery
- Change namespace labels or annotations
- Modify ingress configurations
- Edit service accounts or RBAC
Resource Management
Resources Safe to Modify
Resources Safe to Modify
- Application-specific ConfigMaps (not created by Qovery) - Application-specific Secrets (not created by Qovery) - Custom resources you deployed - Debug pods you created
Resources to Avoid Modifying
Resources to Avoid Modifying
- Deployments managed by Qovery - Services created by Qovery - Ingress resources - Qovery system namespaces (qovery, qovery-system, etc.) - Network policies - Resource quotas
Access Control
- Use least-privilege IAM policies
- Rotate credentials regularly
- Store kubeconfig files securely (never commit to git)
- Use separate IAM users for different team members
- Enable AWS CloudTrail for audit logs
- Consider using AWS SSO for temporary credentials
Comparison of Methods
Next Steps
Qovery CLI Reference
Explore all Qovery CLI commands and features
Cluster Management
Learn more about managing clusters in Qovery
Deployment Logs
View deployment logs through Qovery Console
Port Forwarding
Use Qovery CLI port forwarding feature
Related Resources
- kubectl Documentation
- AWS EKS User Guide
- Kubernetes RBAC
- AWS IAM Best Practices
- Qovery Kubernetes Changelog - Kubernetes cluster related updates